Tutorial: How to install a K-Tech SSK Piston Kit on a Honda CRF300L?

Our new Hondas should get a proper suspension upgrade this time, so I did some research for front suspension upgrades on a Honda CRF300L. Actually I wanted to upgrade a full cartridge kit like Andreani or the brand new K-Tech 20IDS cartridges. However, due to very severe restrictions in Germany, it is actually impossible to install these cartridge upgrades legally. So I had to look for alternatives. Exchanging the spring only wasn’t satisfying enough for us. We are also only allowed to install specifically certified springs btw 😉

The only option left, was changing the internals, that can’t be seen from outside and I found the RaceTech Gold Valves from the US and K-Tech SSK Piston Kit from the UK. In Europe seems to be no shop to order the RaceTech valves, so I would have to order them from the US with a lot of import charges. Buying the K-Tech pistons is much easier and I quickly found a shop selling them in the EU – means no import. In the end, they look quite similar anyway, so I went for the K-Tech SSK Piston Kit.

I couldn’t see any installation instructions in the internet and the kit also doesn’t come with an instruction manual. Therefore I decided to write a detailed instruction, how I upgraded our CRF300L with that kit. Better grab a beer, because this will take a while…

If you rather like to watch videos, you can find the same Tutorial here on our Youtube-Channel –>

K-Tech SSK pistons for CRF300L

The kit comes in a very nice packaging and could even set a woman’s heart aflutter. The upper one is the new compression valve and the other one the rebound valve. In contrast to the RaceTech valves, they already “should” be completely set up for the CRF300L and ready to install without changing any shims. 

14mm Allen key - highlight of the day
14mm Allen key – highlight of the day
CRF300L on bike stand

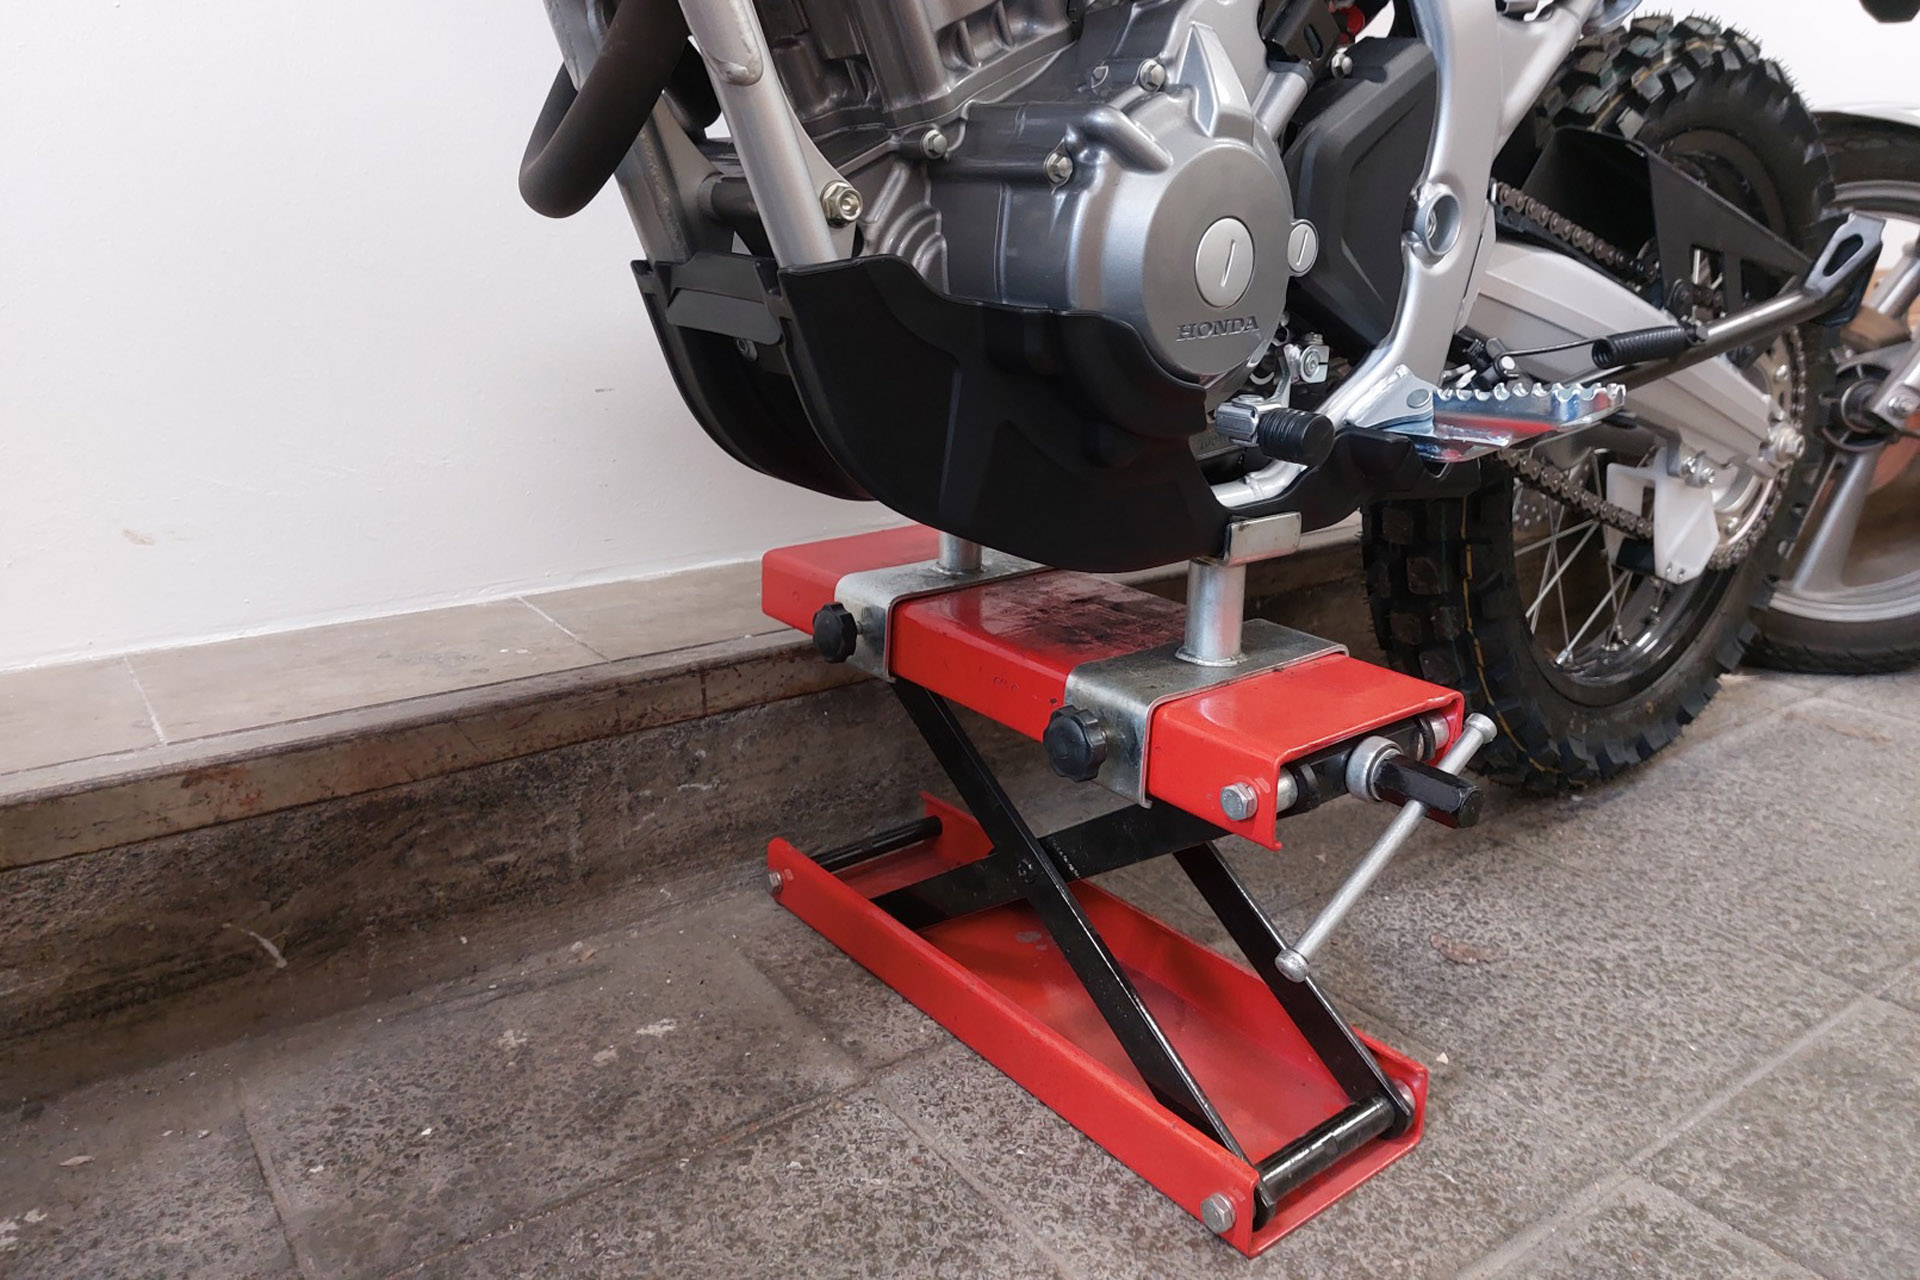
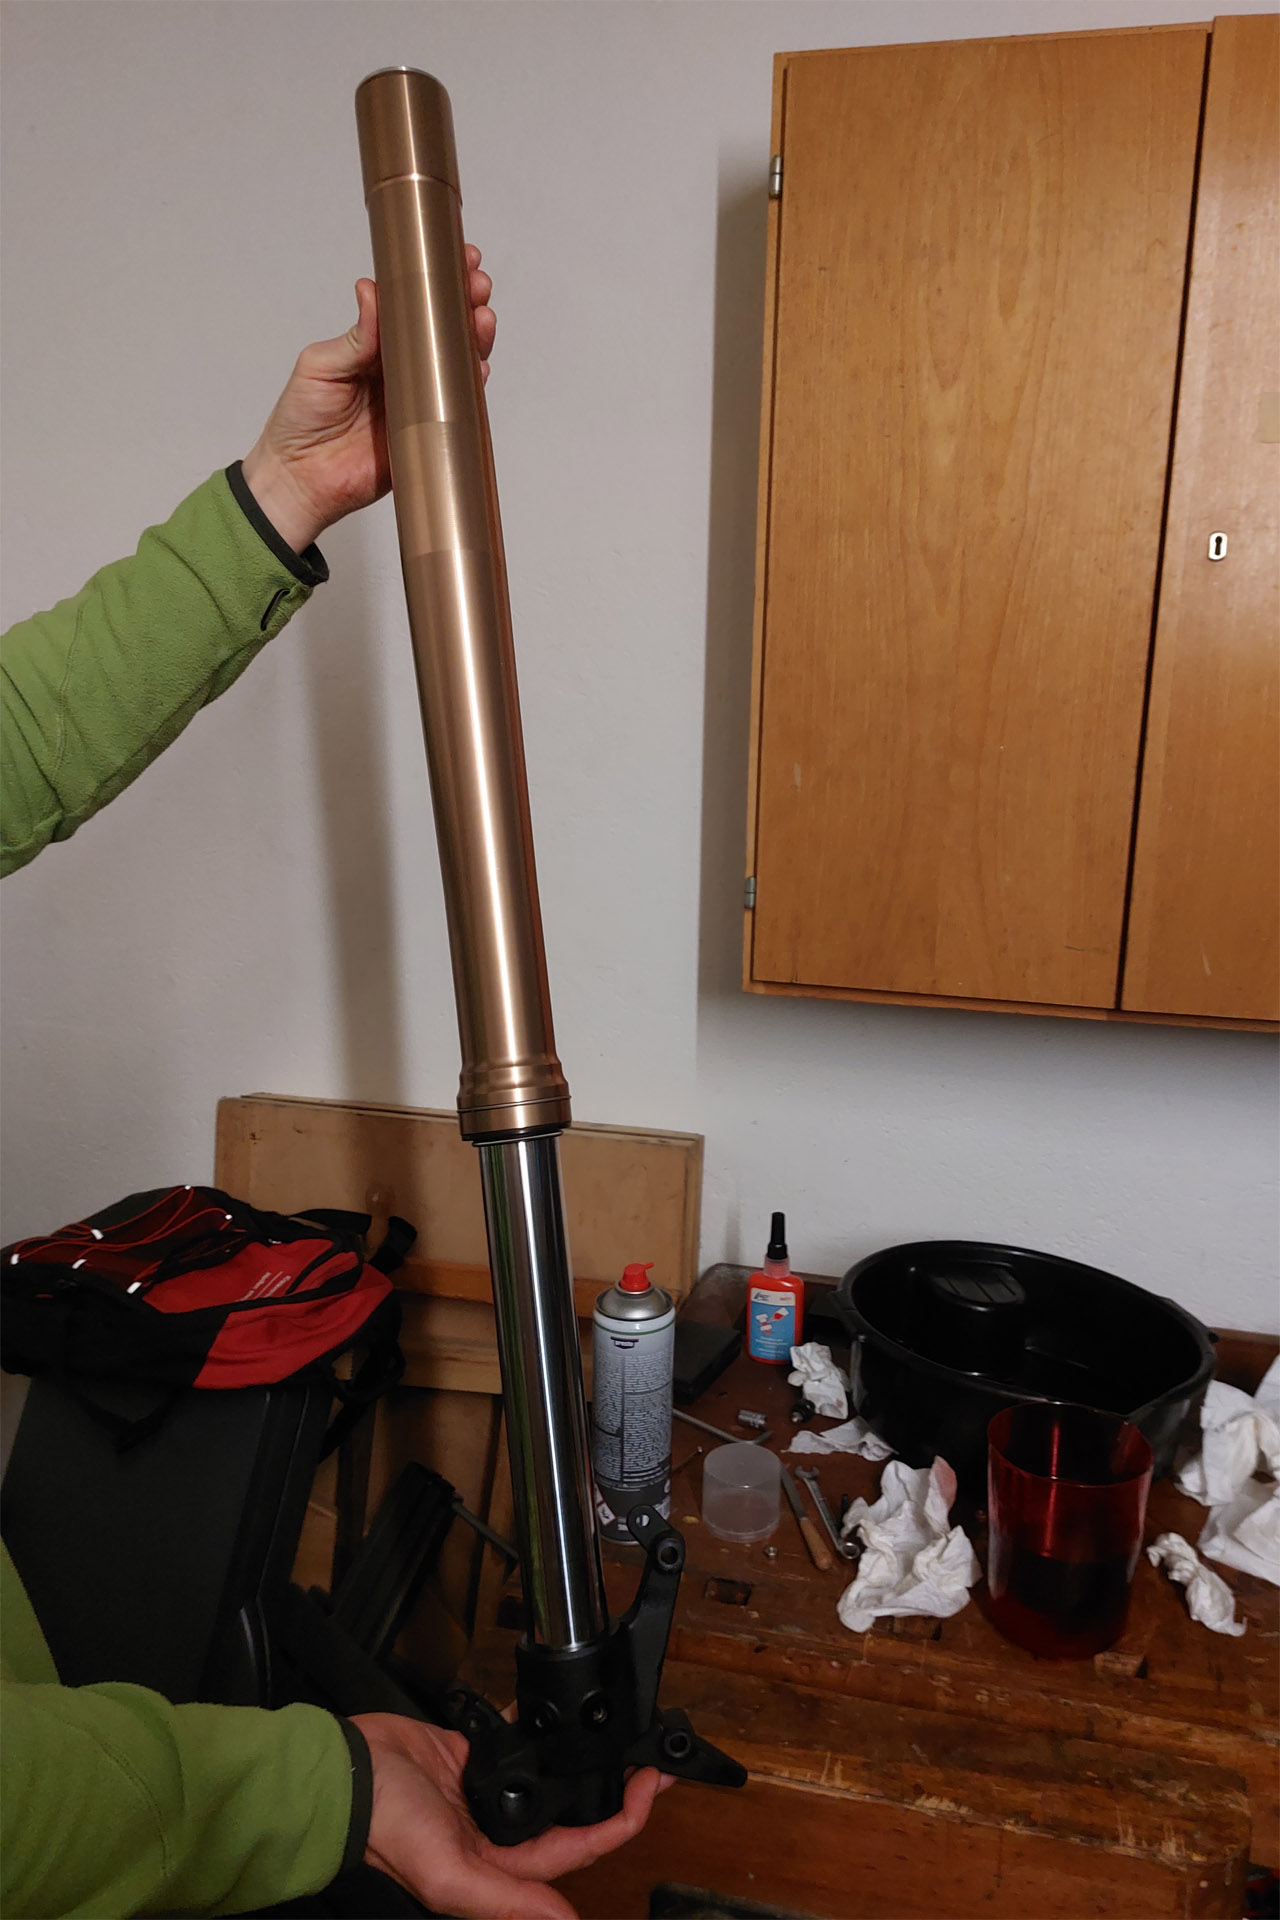
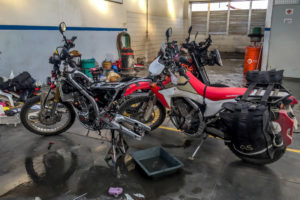
First thing to do, is to remove the left fork leg on our bike. The right leg has only a spring and all the damping is in the left fork leg. 

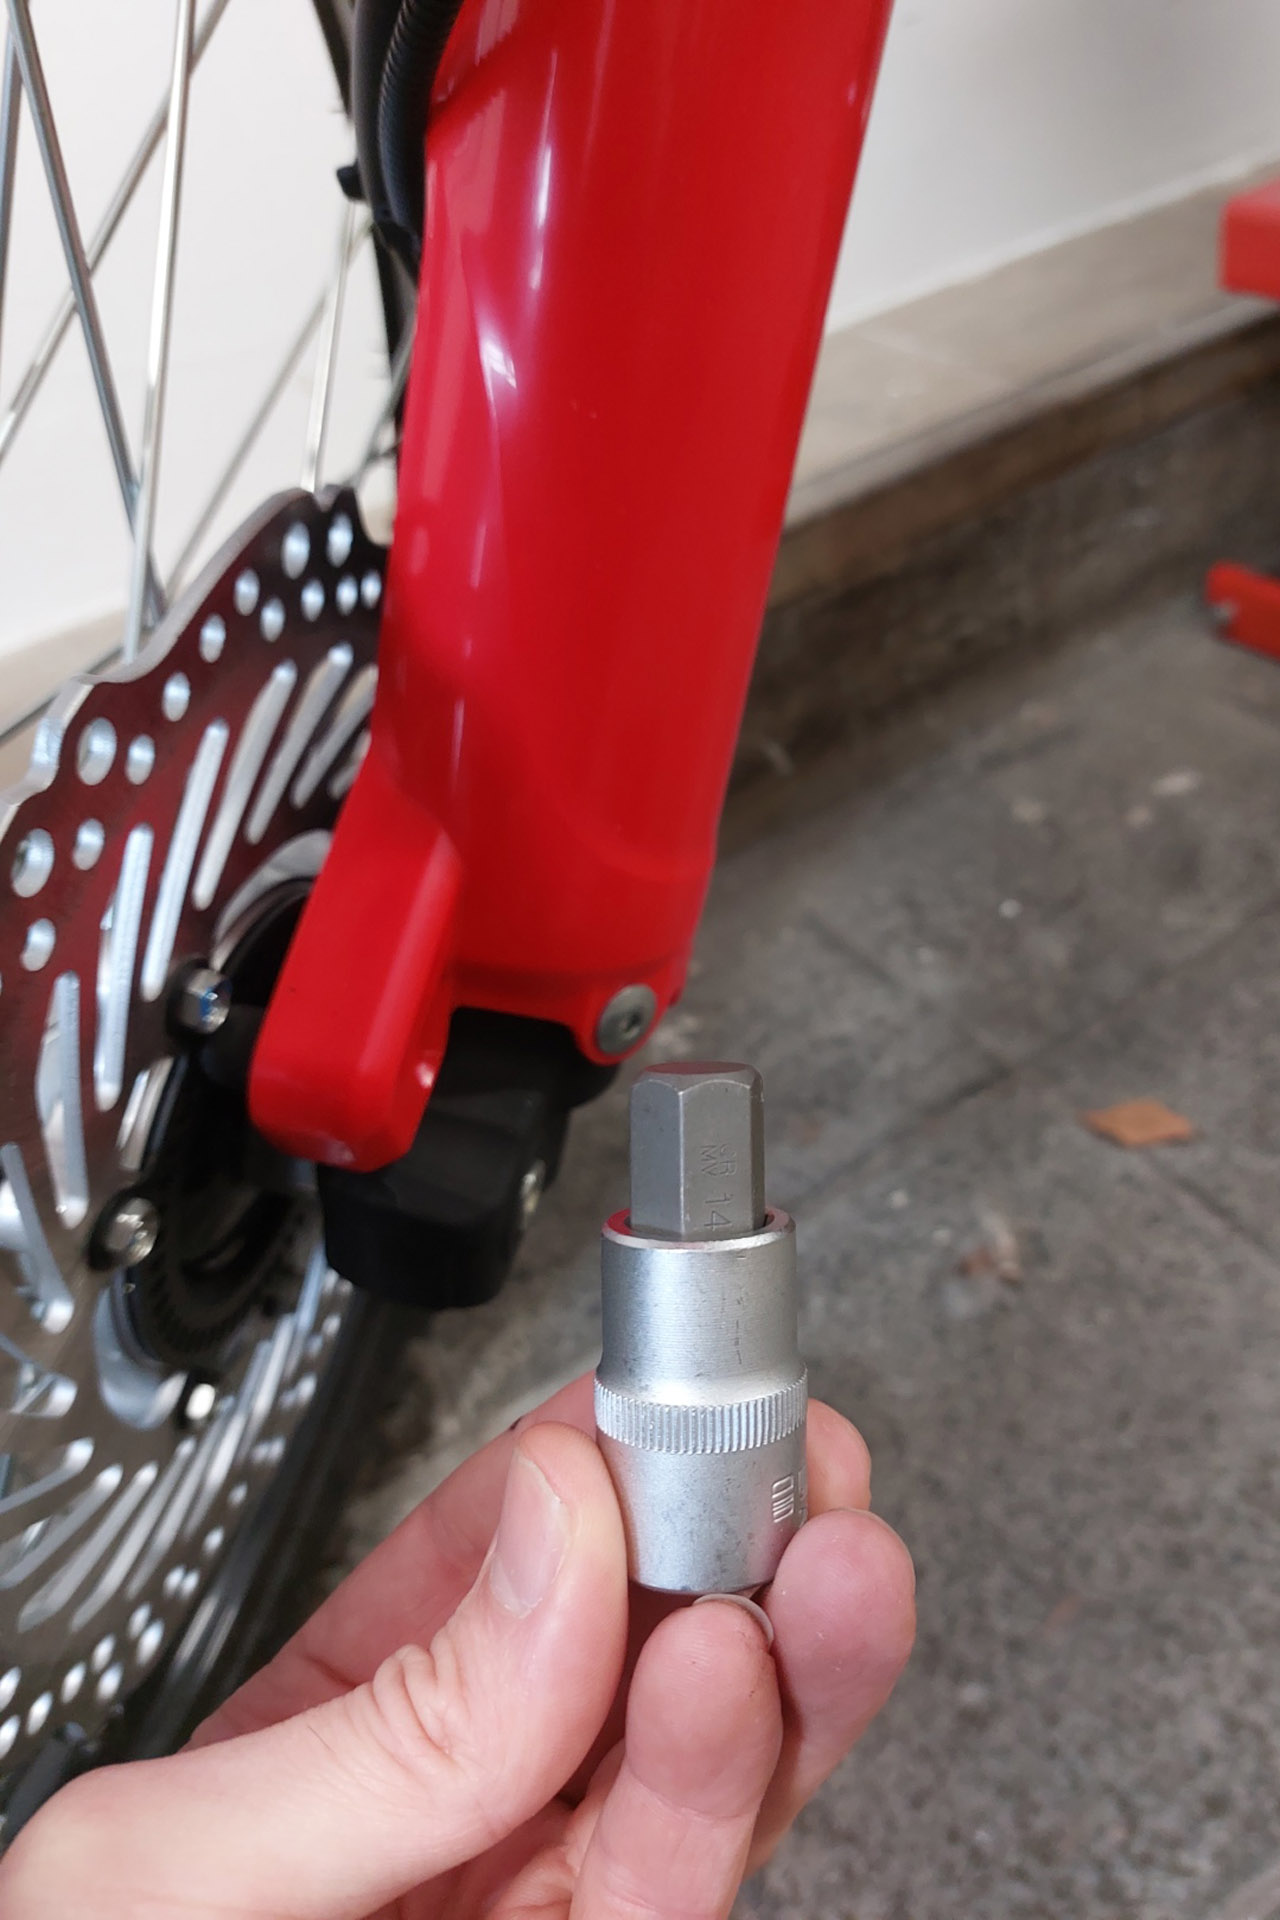
As I tried to remove the front wheel, I got my first surprise. Honda changed the front axle (compared to the CRF250L MD38) and you need a 14mm Allen key now to release the axle. And of course, I didn’t have one in my tool box. So I had to trawl through a few local hardware stores to find one. I can tell you – nowadays it is not easy anymore to find unusual tools in Germany’s local stores. I finally was lucky after a while, but also close to a heart attack. At least, I was able to remove the left fork leg in the end to start working on it.

We put the fork leg onto our working bench and release the bottom srew with a 6mm Allen key. Don’t take it out yet, just free it a little bit. Otherwise oil will already spill out and we’ll get a mess. Next – turn the fork leg around, wrap it with a piece of cloth and clamp it in a vice. We now use a 30mm socket to release the top cap. You could also use an adjustable wrench, but be careful do close it accurately, otherwise you’ll get poor marks on your top cap.

We are ready to dump the fork oil. Take a bowl and turn the fork leg upside down. Start moving the damping rod to get all the oil out of the cartridge. As long as you feel resistance while moving the rod, there is still oil in the cartridge. It helps to turn the fork leg upright in between while moving the rod, until all oil is drained.

Afterwards, we remove the bottom bolt completely. If the cartridge should start turning, try to pull on the damping rod a bit, while turning the bottom screw. Sometimes it doesn’t drop out by itself. I took a long pole to push it out from the top. Make sure, that you don’t loose the little copper washer. We will still need it later on. You can take out the damping cartridge now. 

Free all the parts from oil and lay the fork leg aside. We won’t need it for a while. And it seems to be time to grab a beer!

Circlip in the bottom of the cartridge
Cartridge, compression piston and circlip

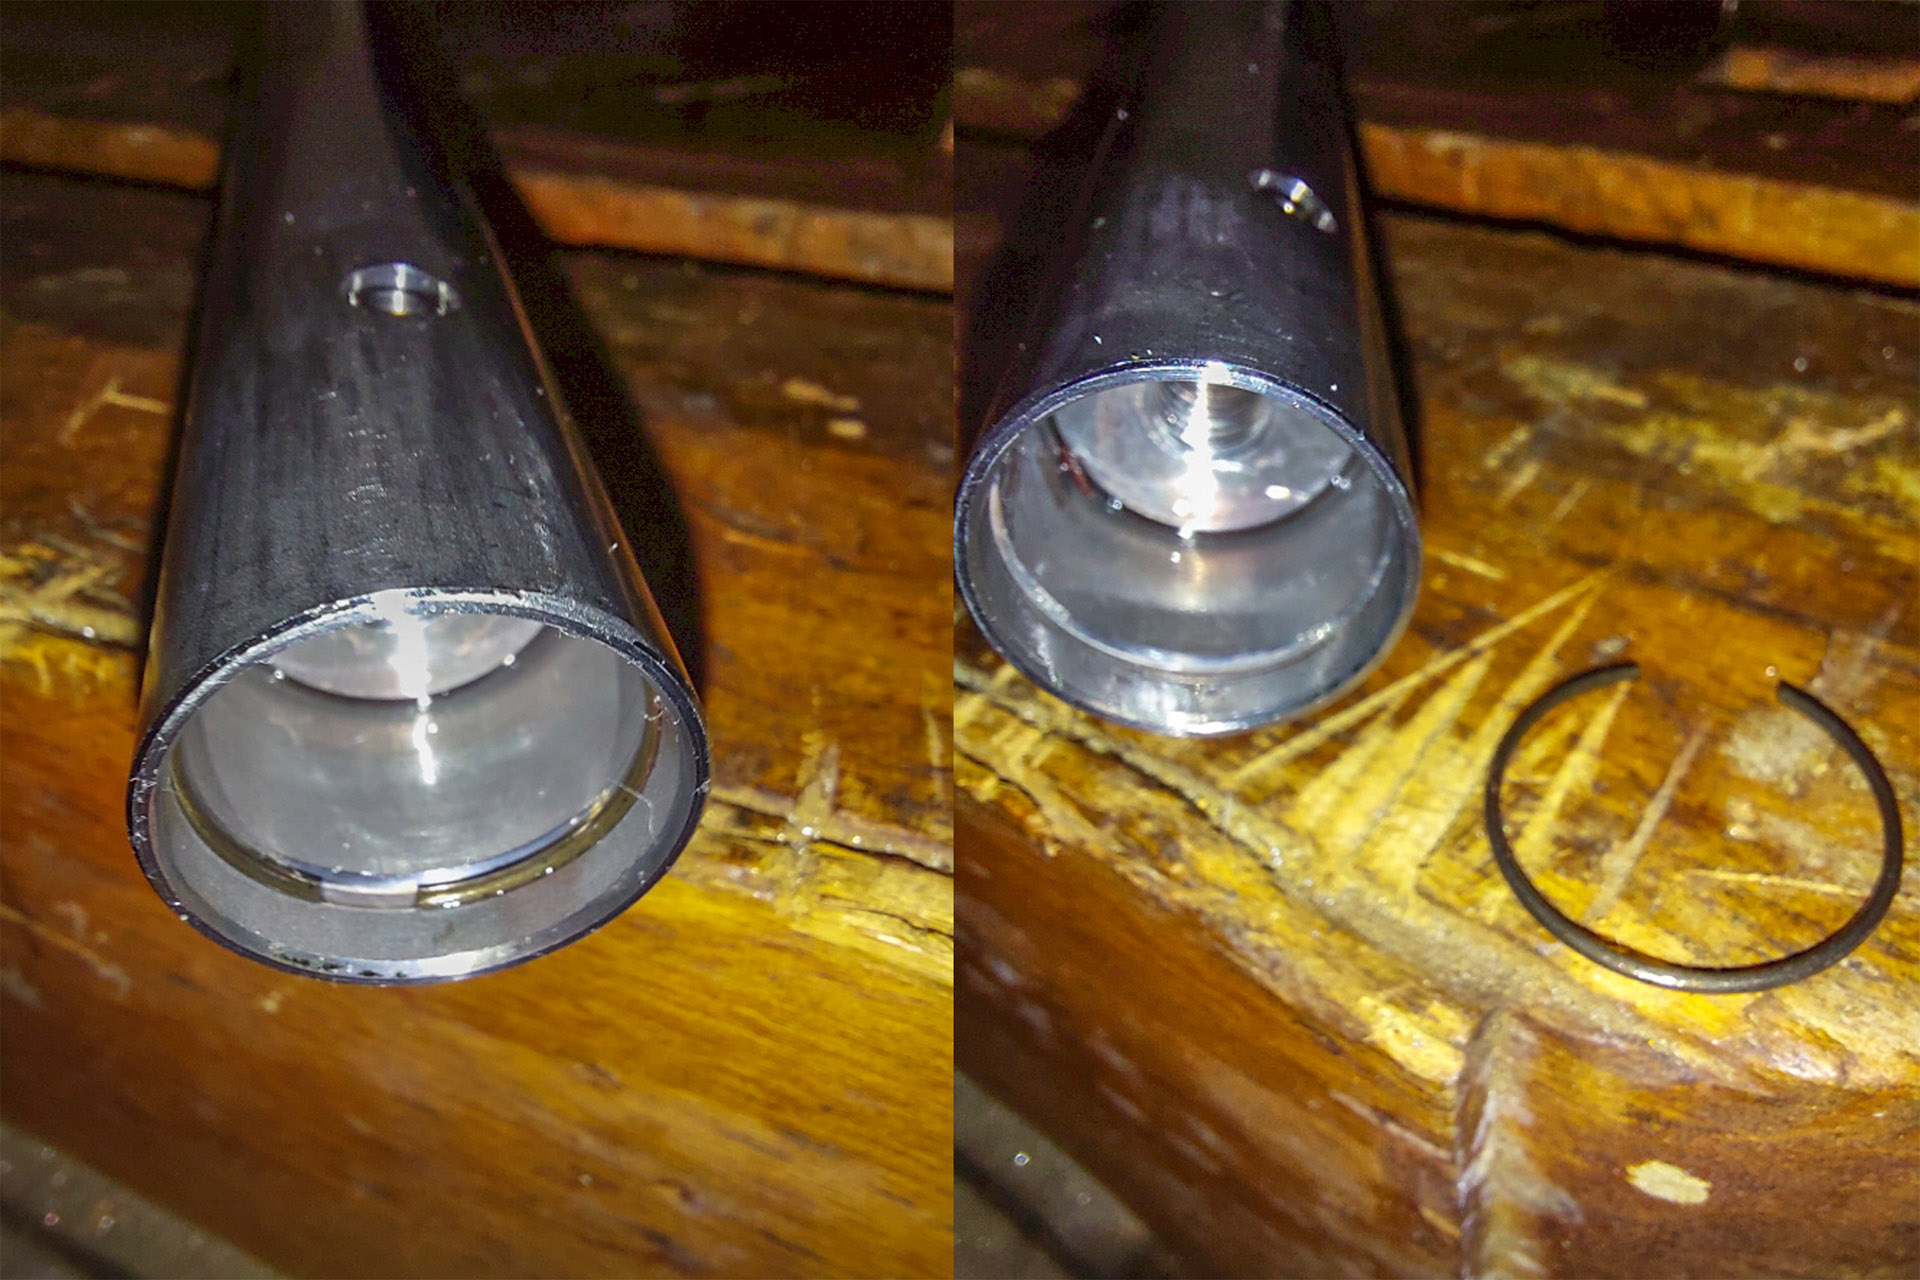
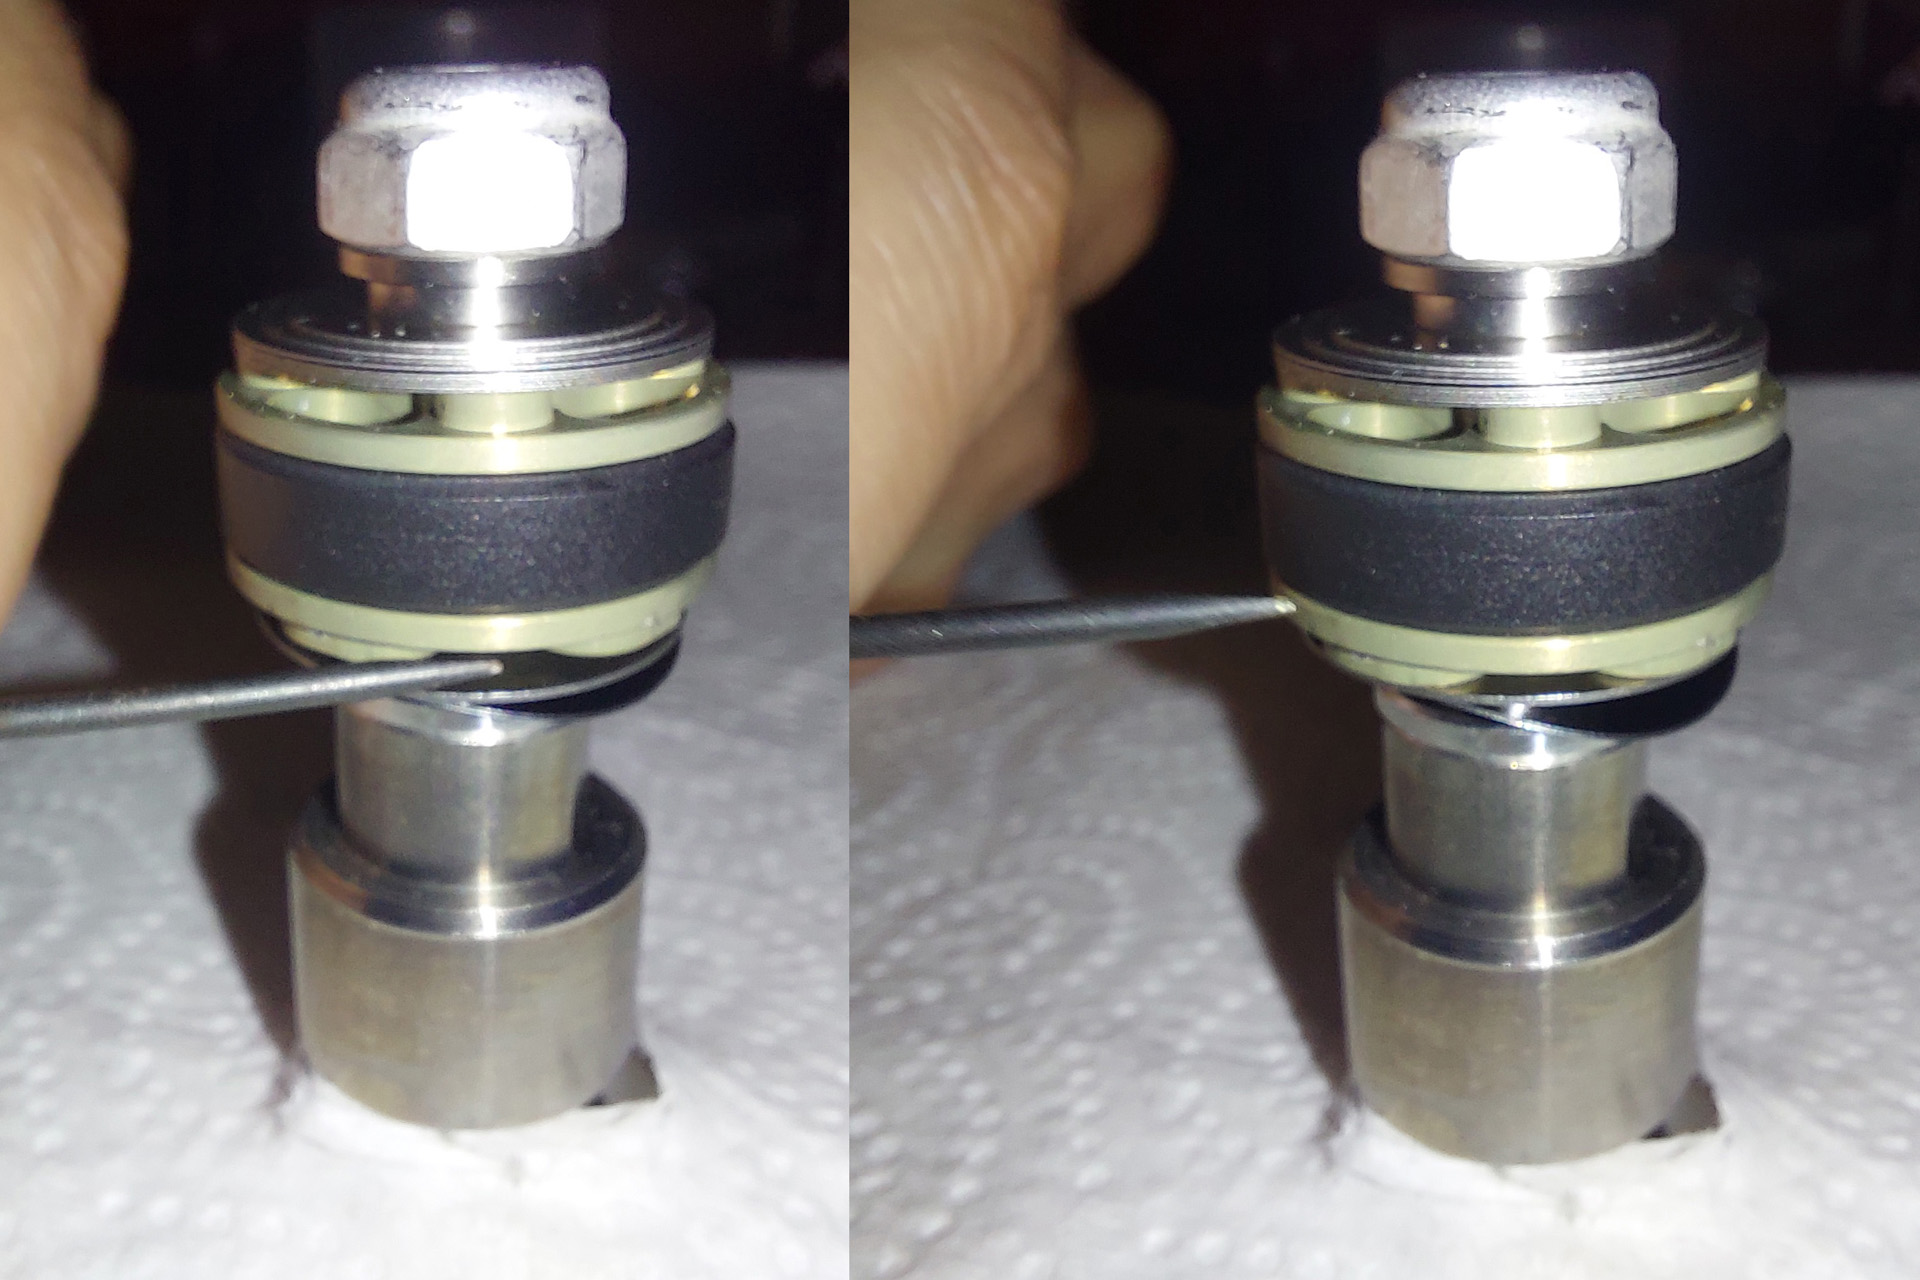
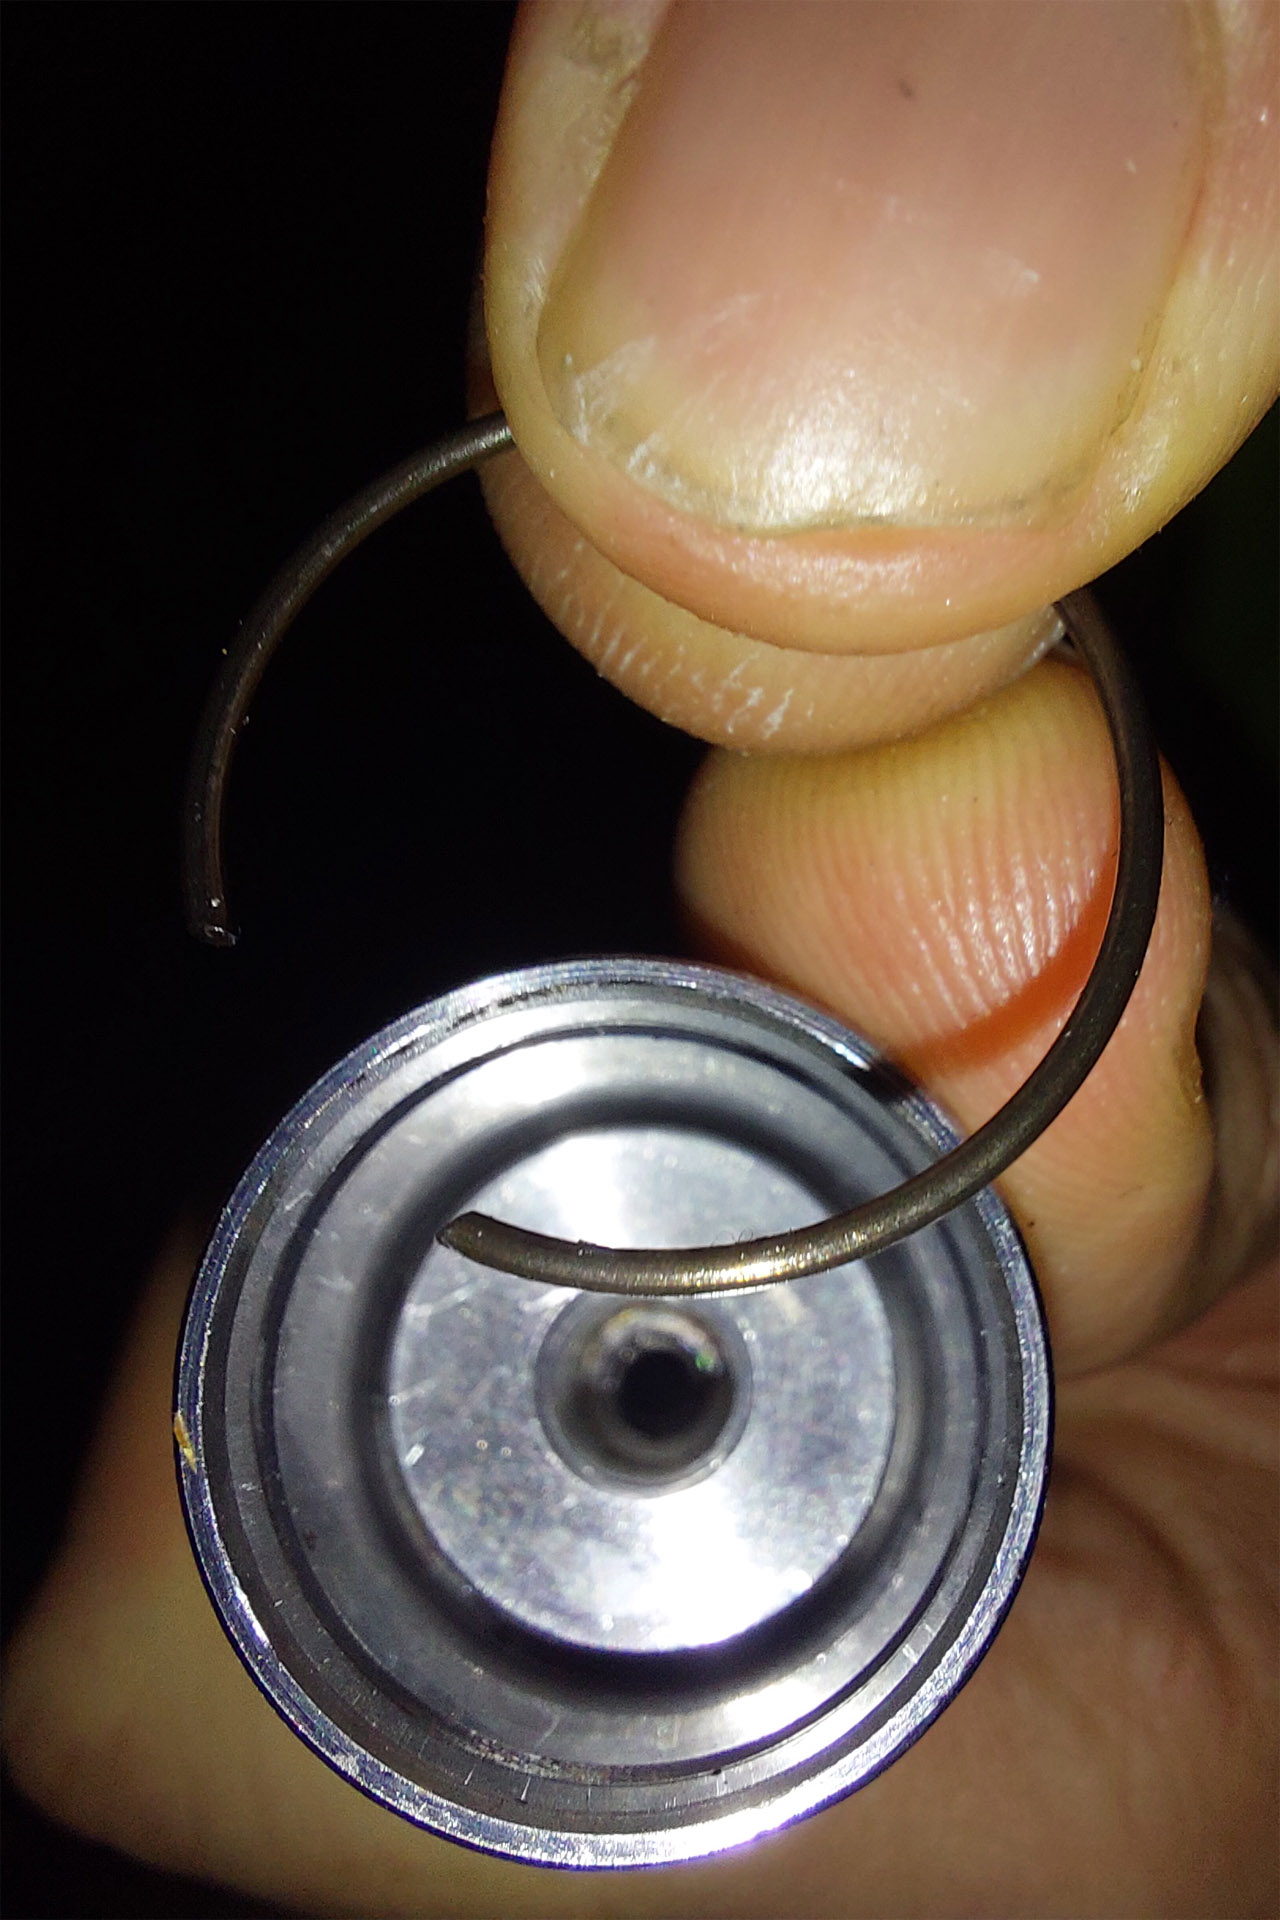
Take the damping cartridge and turn it upside down. You should see the base of the compression piston now. Take one of your fingers and push it a bit towards the inside. Now you can see a small groove with a circlip. We have to remove this circlip to be able to take out the compression piston. Take a small screw driver and lift it out carefully. Make sure, that you don’t damage the groove. It felt easier to me, to push the circlip inwards first instead of trying to push it towards the outside. In the end it doesn’t matter how you do it, but the circlip has to be removed.

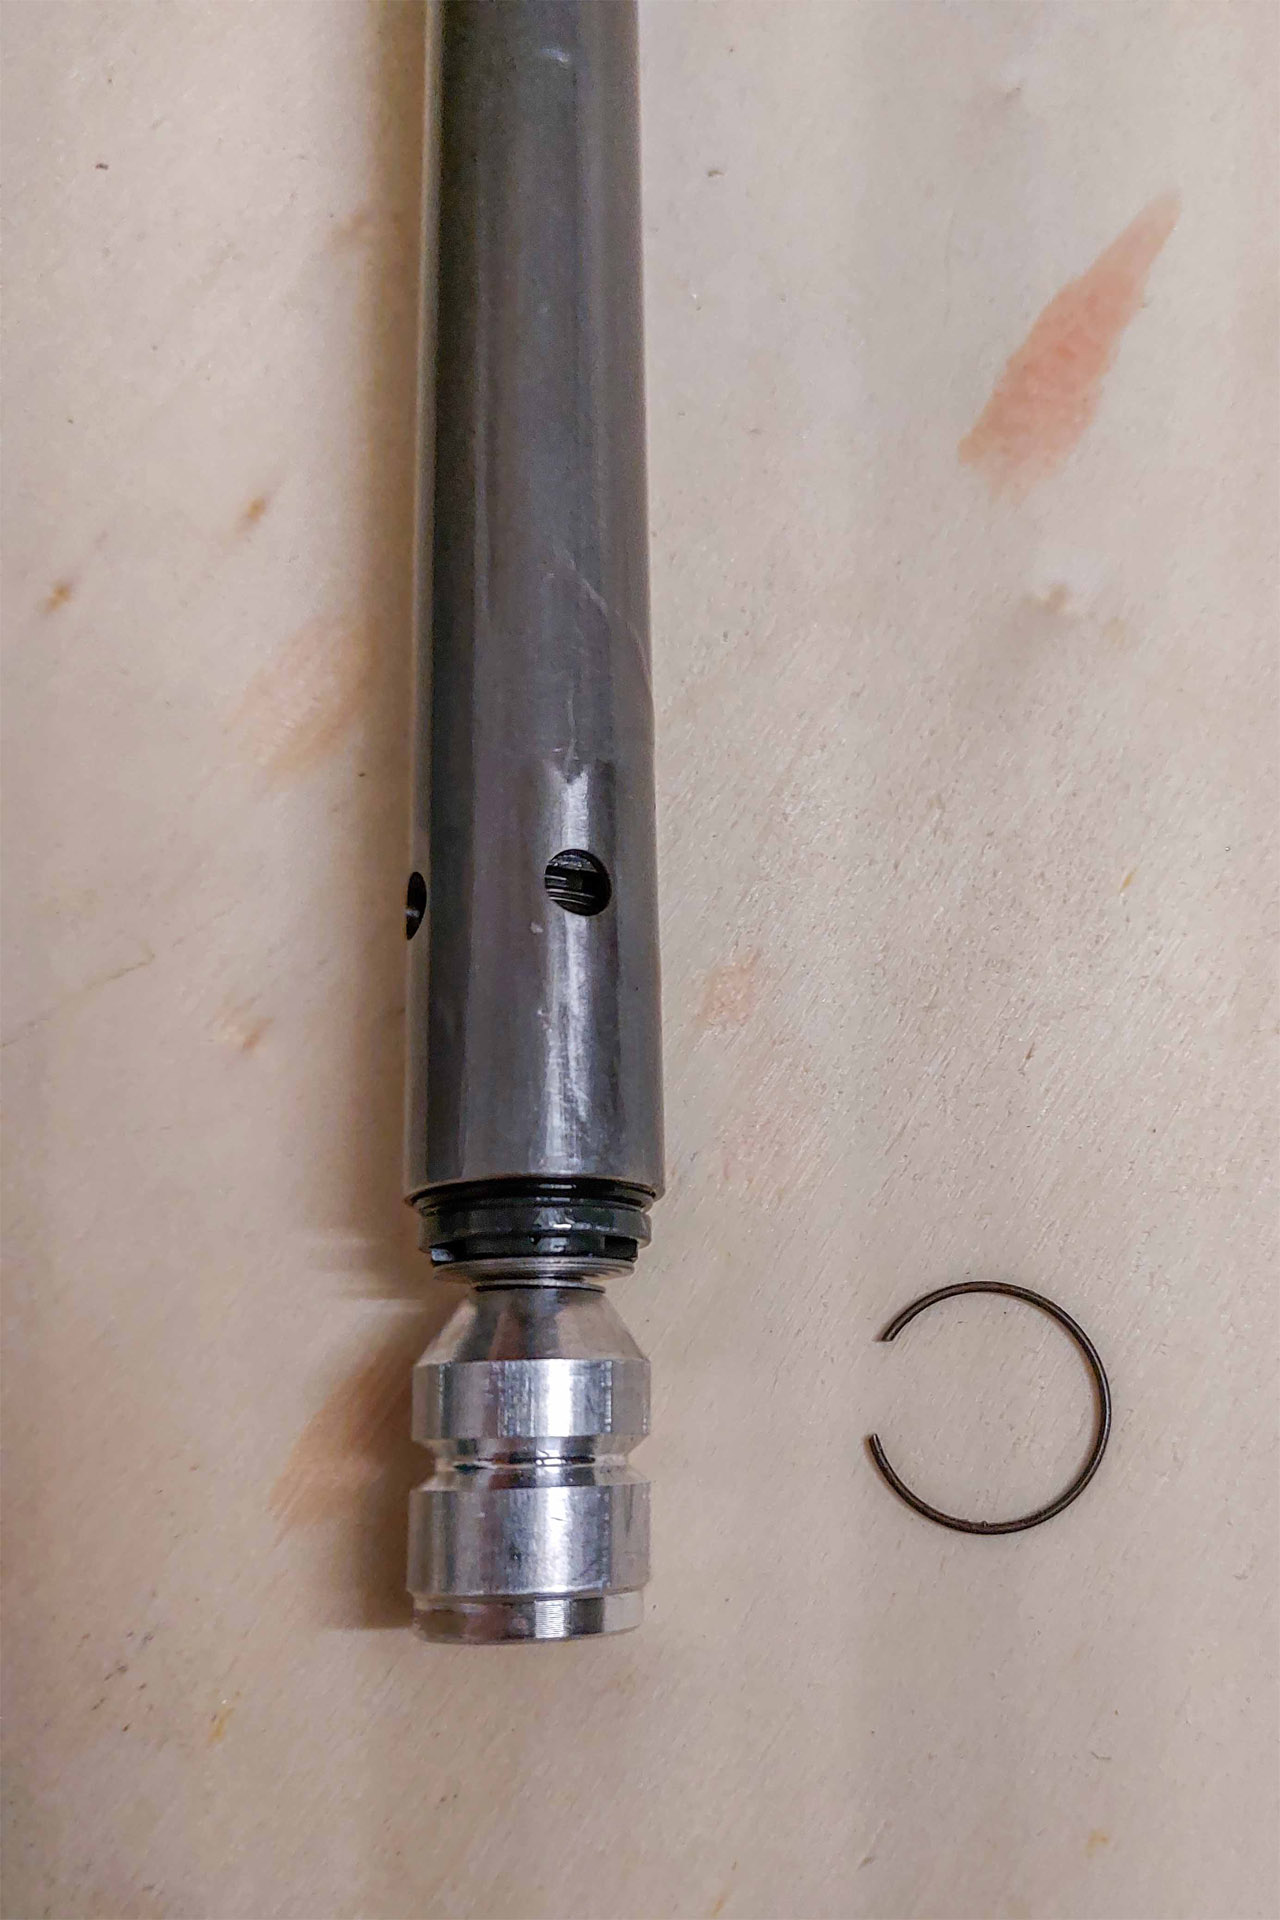
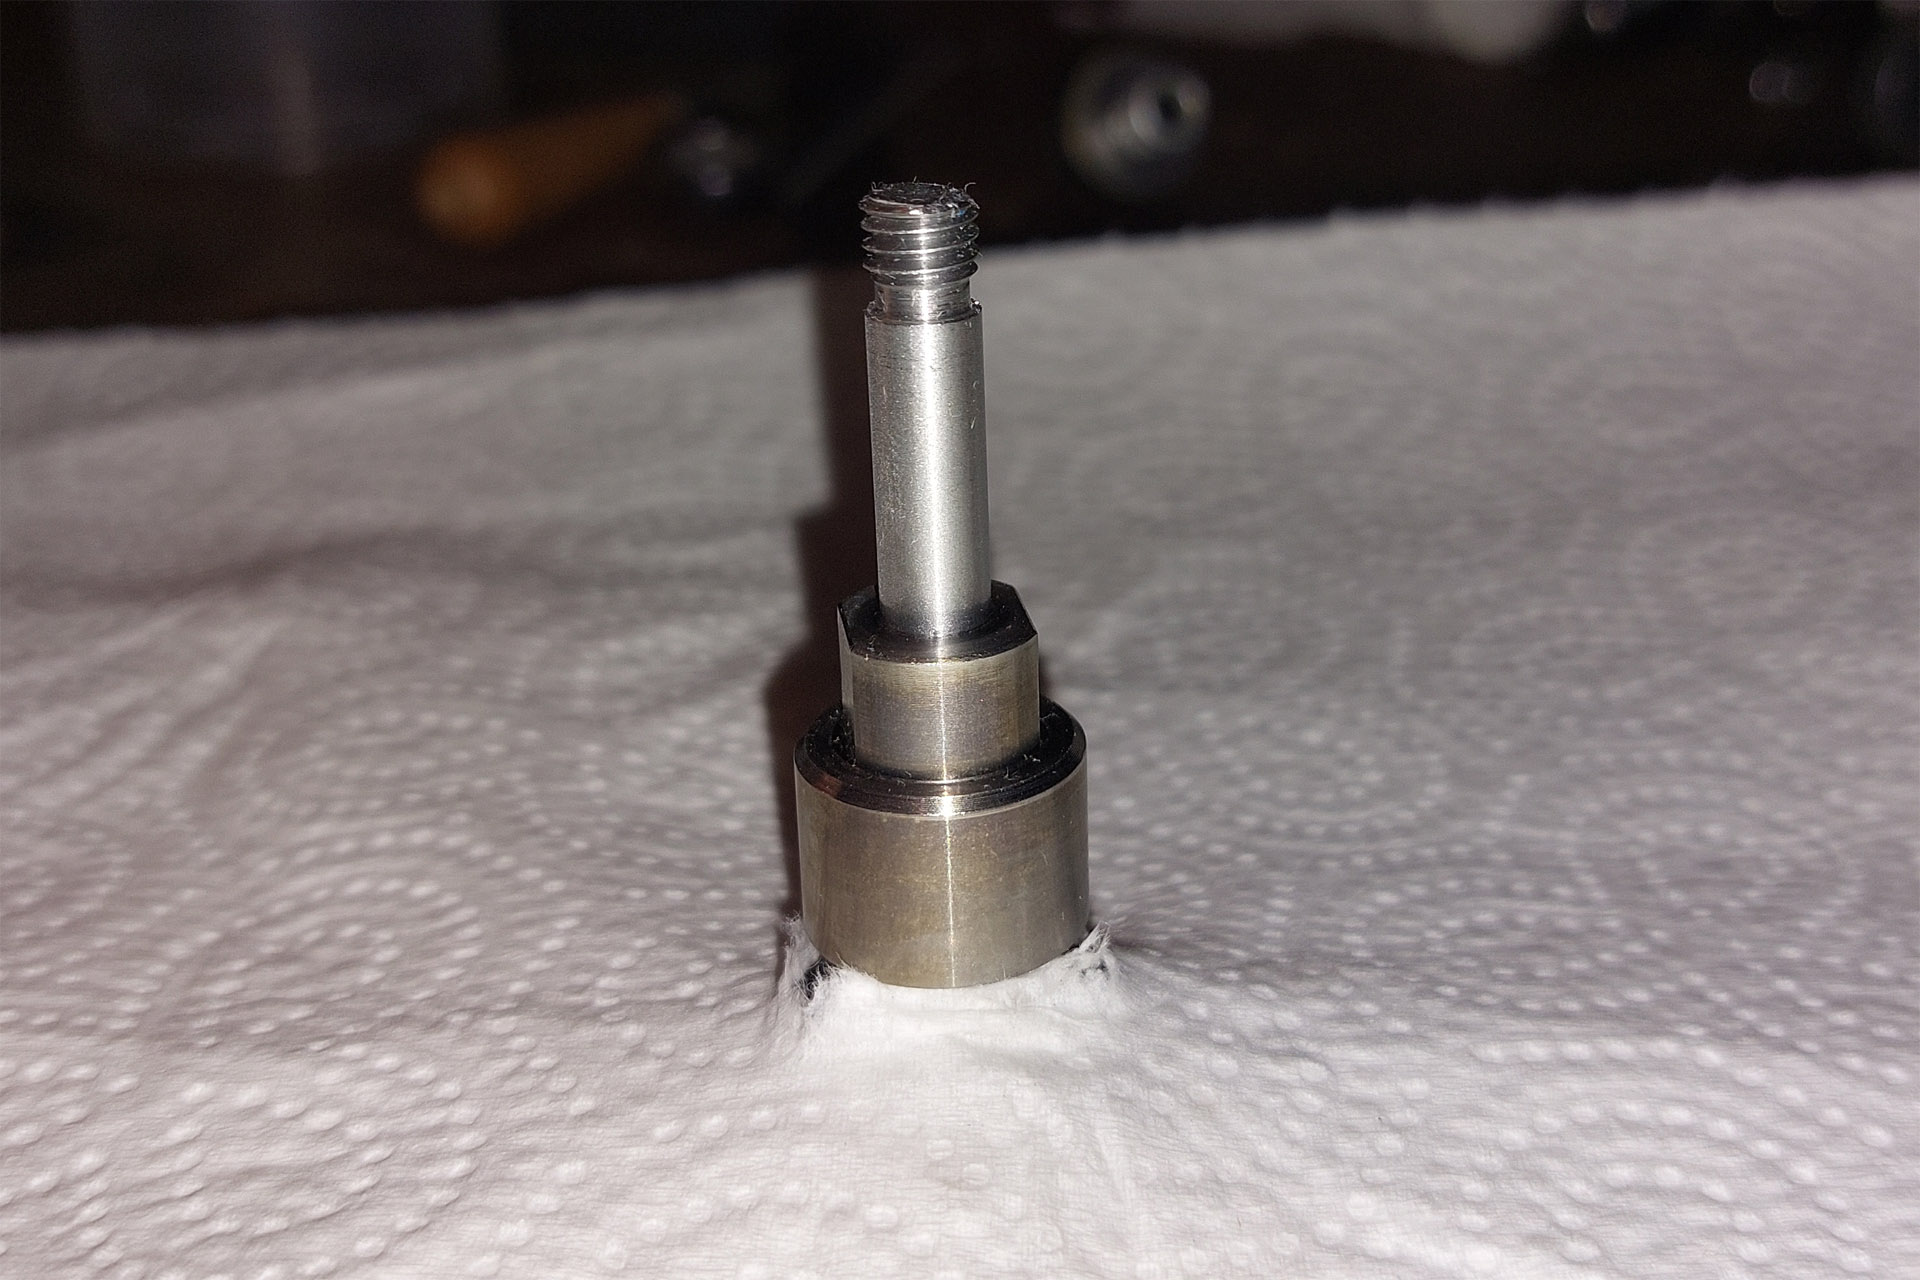
The compression piston doesn’t drop out by itself. Usually, it gets stuck where the groove is. Especially, because the compression valve has a seal, that loves to slip into the groove. Therefore, take the damping rod and give it a gentle push to slide out. You can lay everything aside now, but the compression piston, that you can see in the following photo.

CRF300L compression piston

Take a piece of cloth, wrap it around the compression base and clamp it in the vice. We’ll have to remove the scew holding the compression stack next. Best is to keep a nut ready, to be able to secure the scew as soon as it is removed. Actually we won’t need it anymore, but some people might want to keep it. If you should be one of these persons, make sure to keep everything in the right order. 

We are ready to install the new K-Tech valves onto the old compression base now. As I have already mentioned before, the K-Tech valves should be ready to install, when they come out of the packaging. They are also stacked on a screw and secured by a nut. The whole stack also has to stay in the right order, of course. So be careful to not confuse them. There is no manual, where you can see the right order.

When I had a closer look at the valves, I started wondering a bit. It can’t be correct like that. Obviously the compression stack was mounted upside down. We had ordered 2 piston kits, since we also have 2 bikes – so I checked the other kit quickly and it was also mounted incorrectly. Here you can see a closeup with the base, the old and the new compression stack.

Compression stack comparison

The K-Tech compression stack has to be turned around. Therefore, we grab the stack with shaky hands (better have another beer, before you do that), hold the stack together, remove the bolt and put it in again from the other side. Don’t mess it up, or you’ll have to contact K-Tech and pray, that they will tell you the right order + you have to measure all these little shims to restore the whole stack.

In case you have managed that without a tragedy, we degrease the thread of the screw and the thread of the compression base. Give a drop of red loctite onto the thread of the screw, but don’t take too much. You don’t want to have any loctite on your shims. Afterwards screw your compression valve onto the compression base. Important! There is an aluminium clamp washer, that goes through the spring washer and through a shim into an opening in the aluminium middle part (valve). It gets pushed out by the spring washer as long as the piston is not mounted yet. So – be 100% sure, that the aluminium clamp washer goes through the shim into the valve, before you tighten the screw. Otherwise you’ll destroy the shim. Just preload and hold it together with your fingers to make sure that can’t happen. Take a torque wrench and tighten the screw with 30 in-lbs (~3,4 N-m). I got this value from the RaceTech manual for a CRF250L, that has the same compression base. Don’t tighten it too hard. The valves are quite damageable.

Job done – we are going to check one more time, if everything is correct. The shim on the spring washer side must be able to slide freely. See the next photo for that. Left side, shim is lifted – right side, shim is in it’s original position.

Check, that the shim can move freely

We are finished with the compression piston now and can continue with the rebound piston. In contrast to the compression stack, the rebound stack was mounted correctly out of the packaging. However, it has to be taken off the screw and placed onto the tip of the damping rod anyway.

Deformed tip of the damping rod
Grind the deformed part of the rod

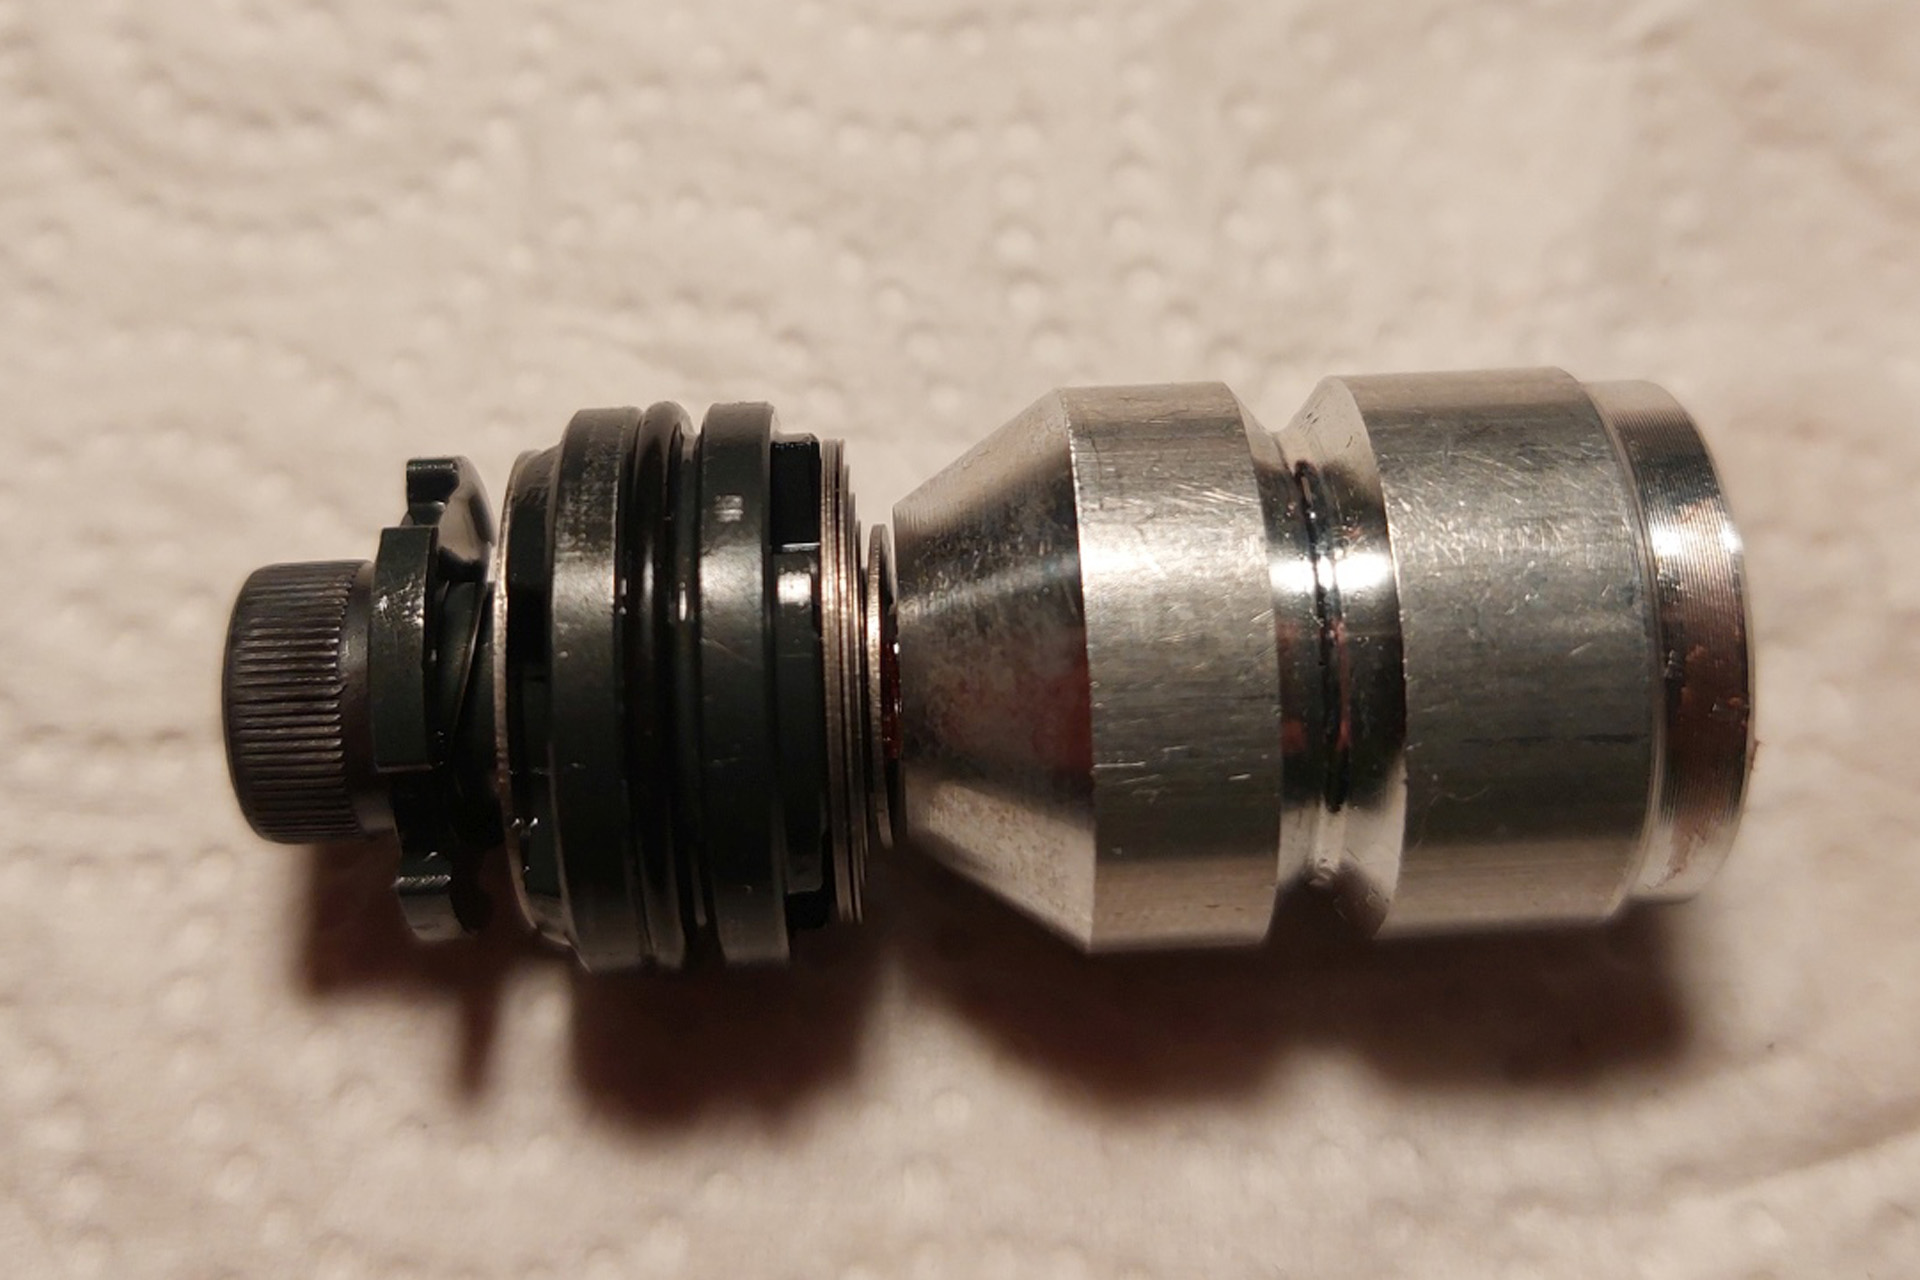
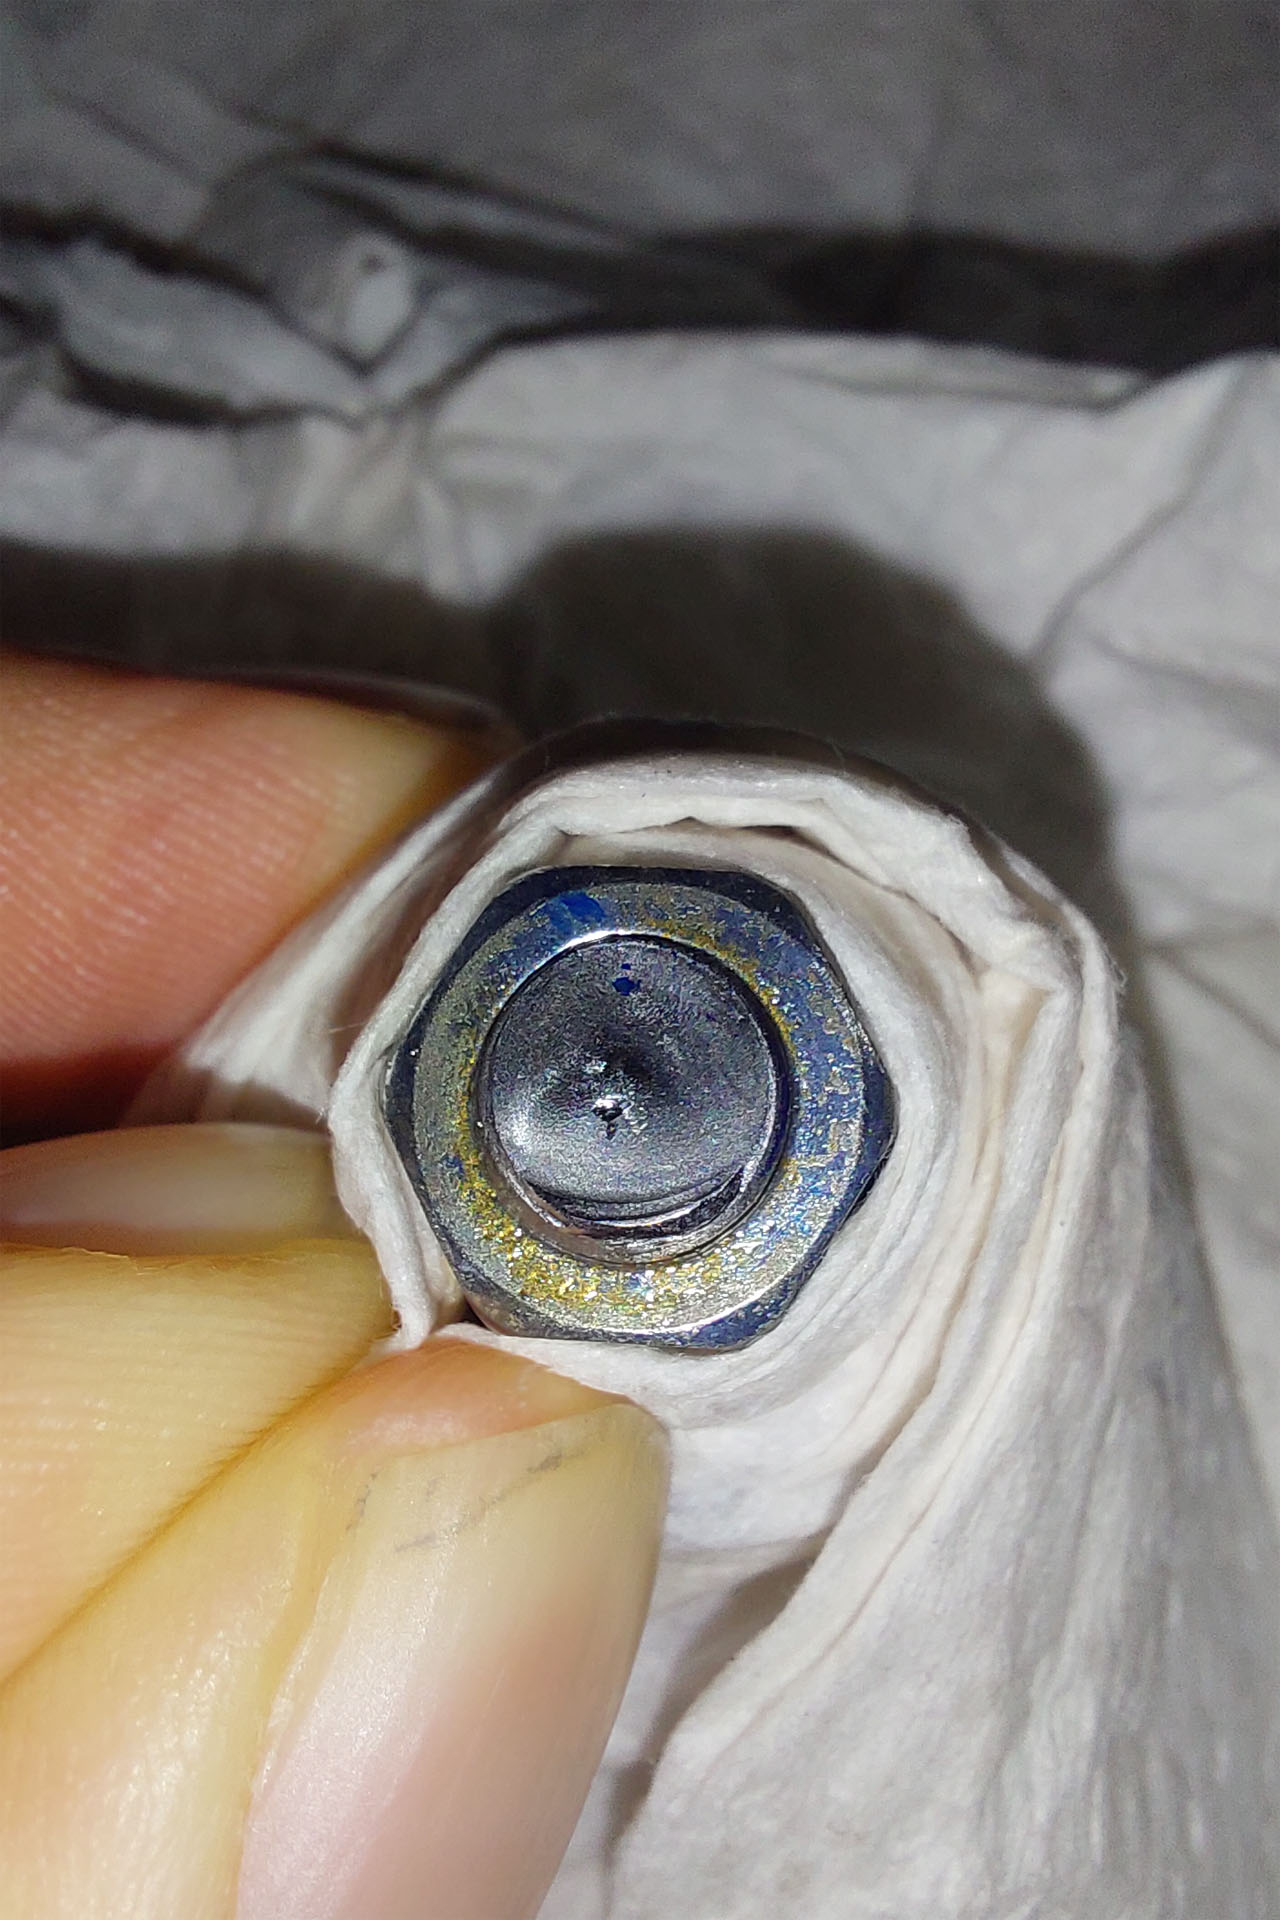
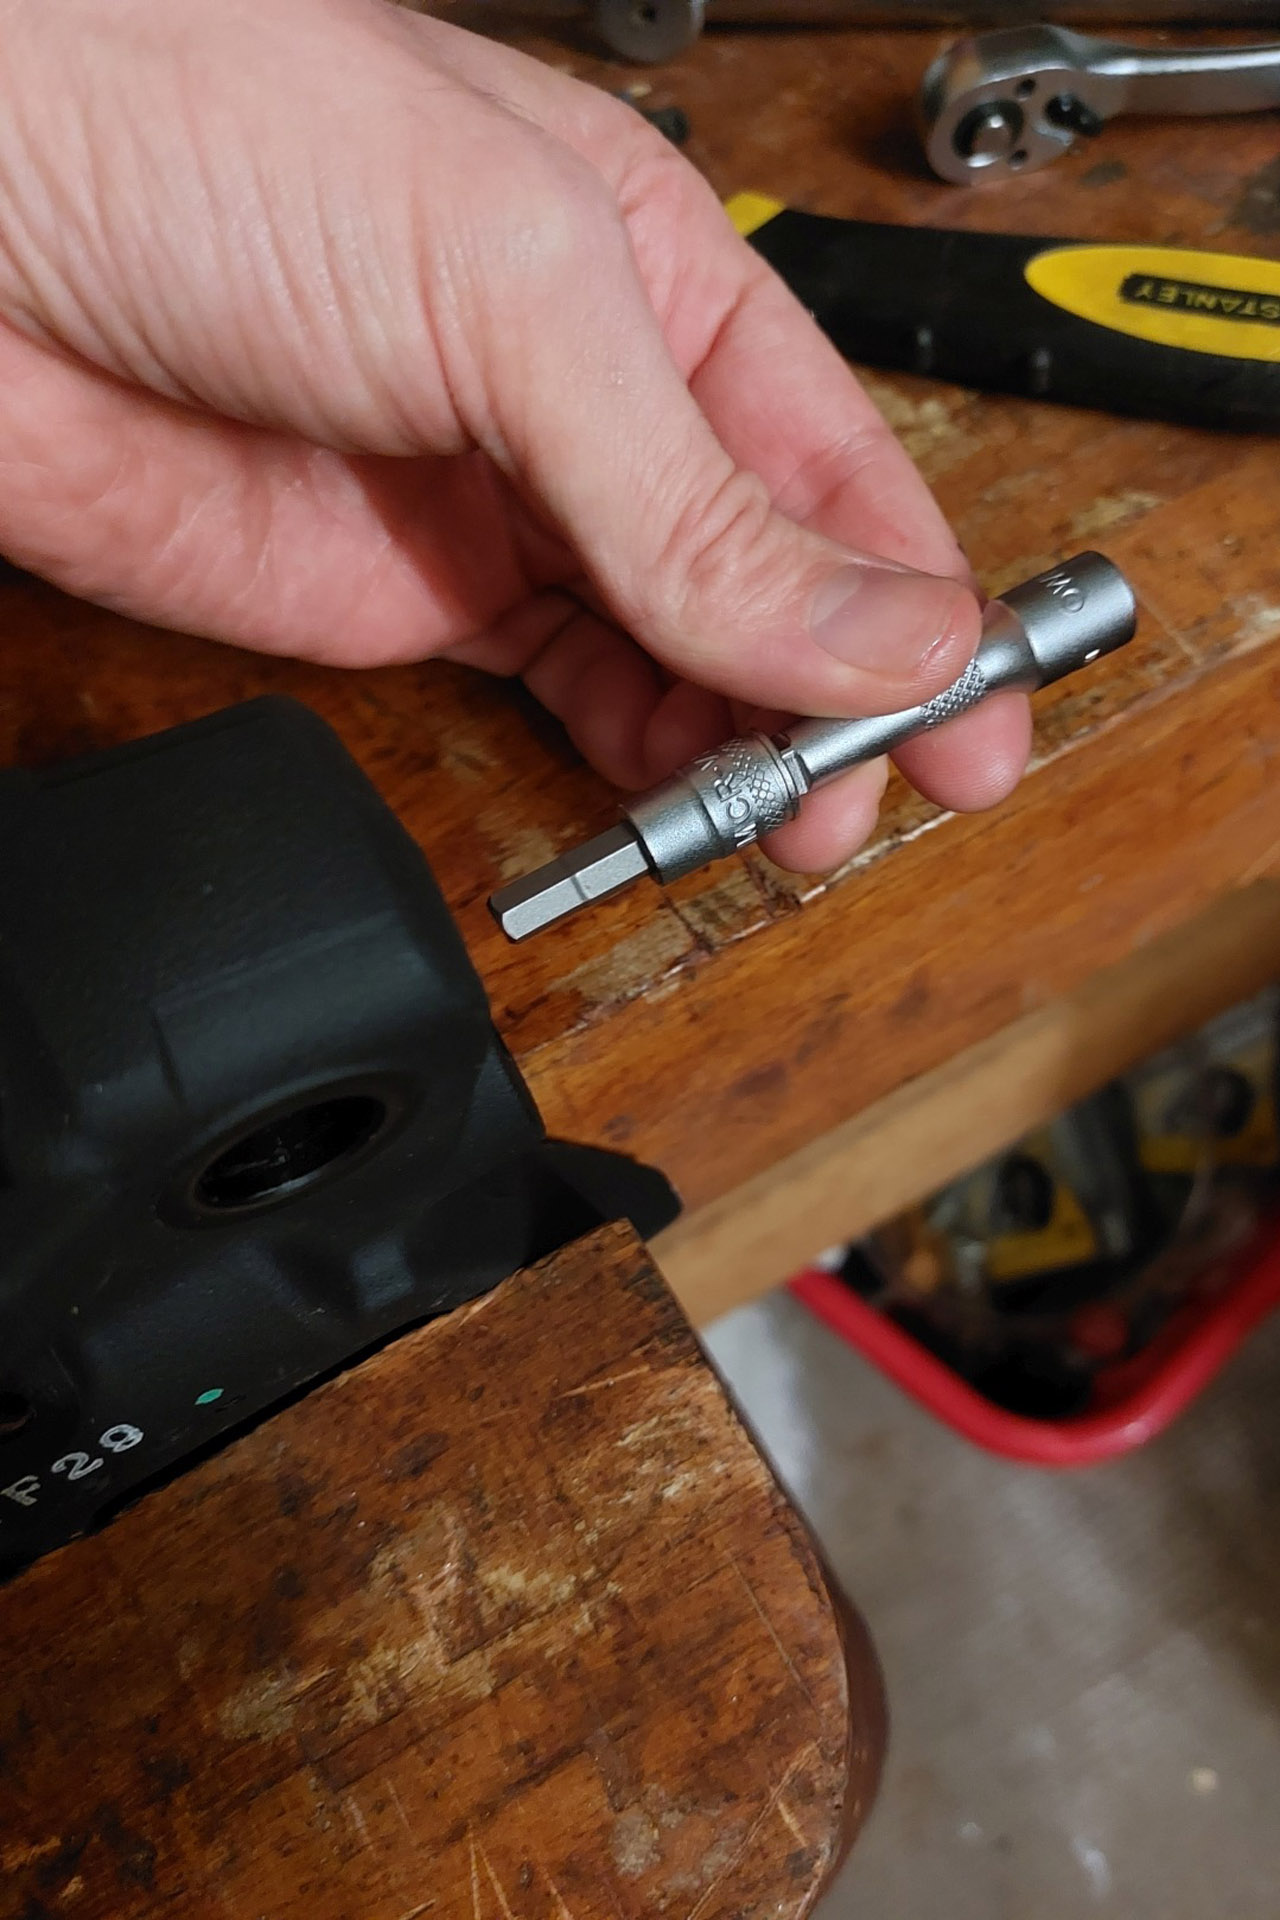
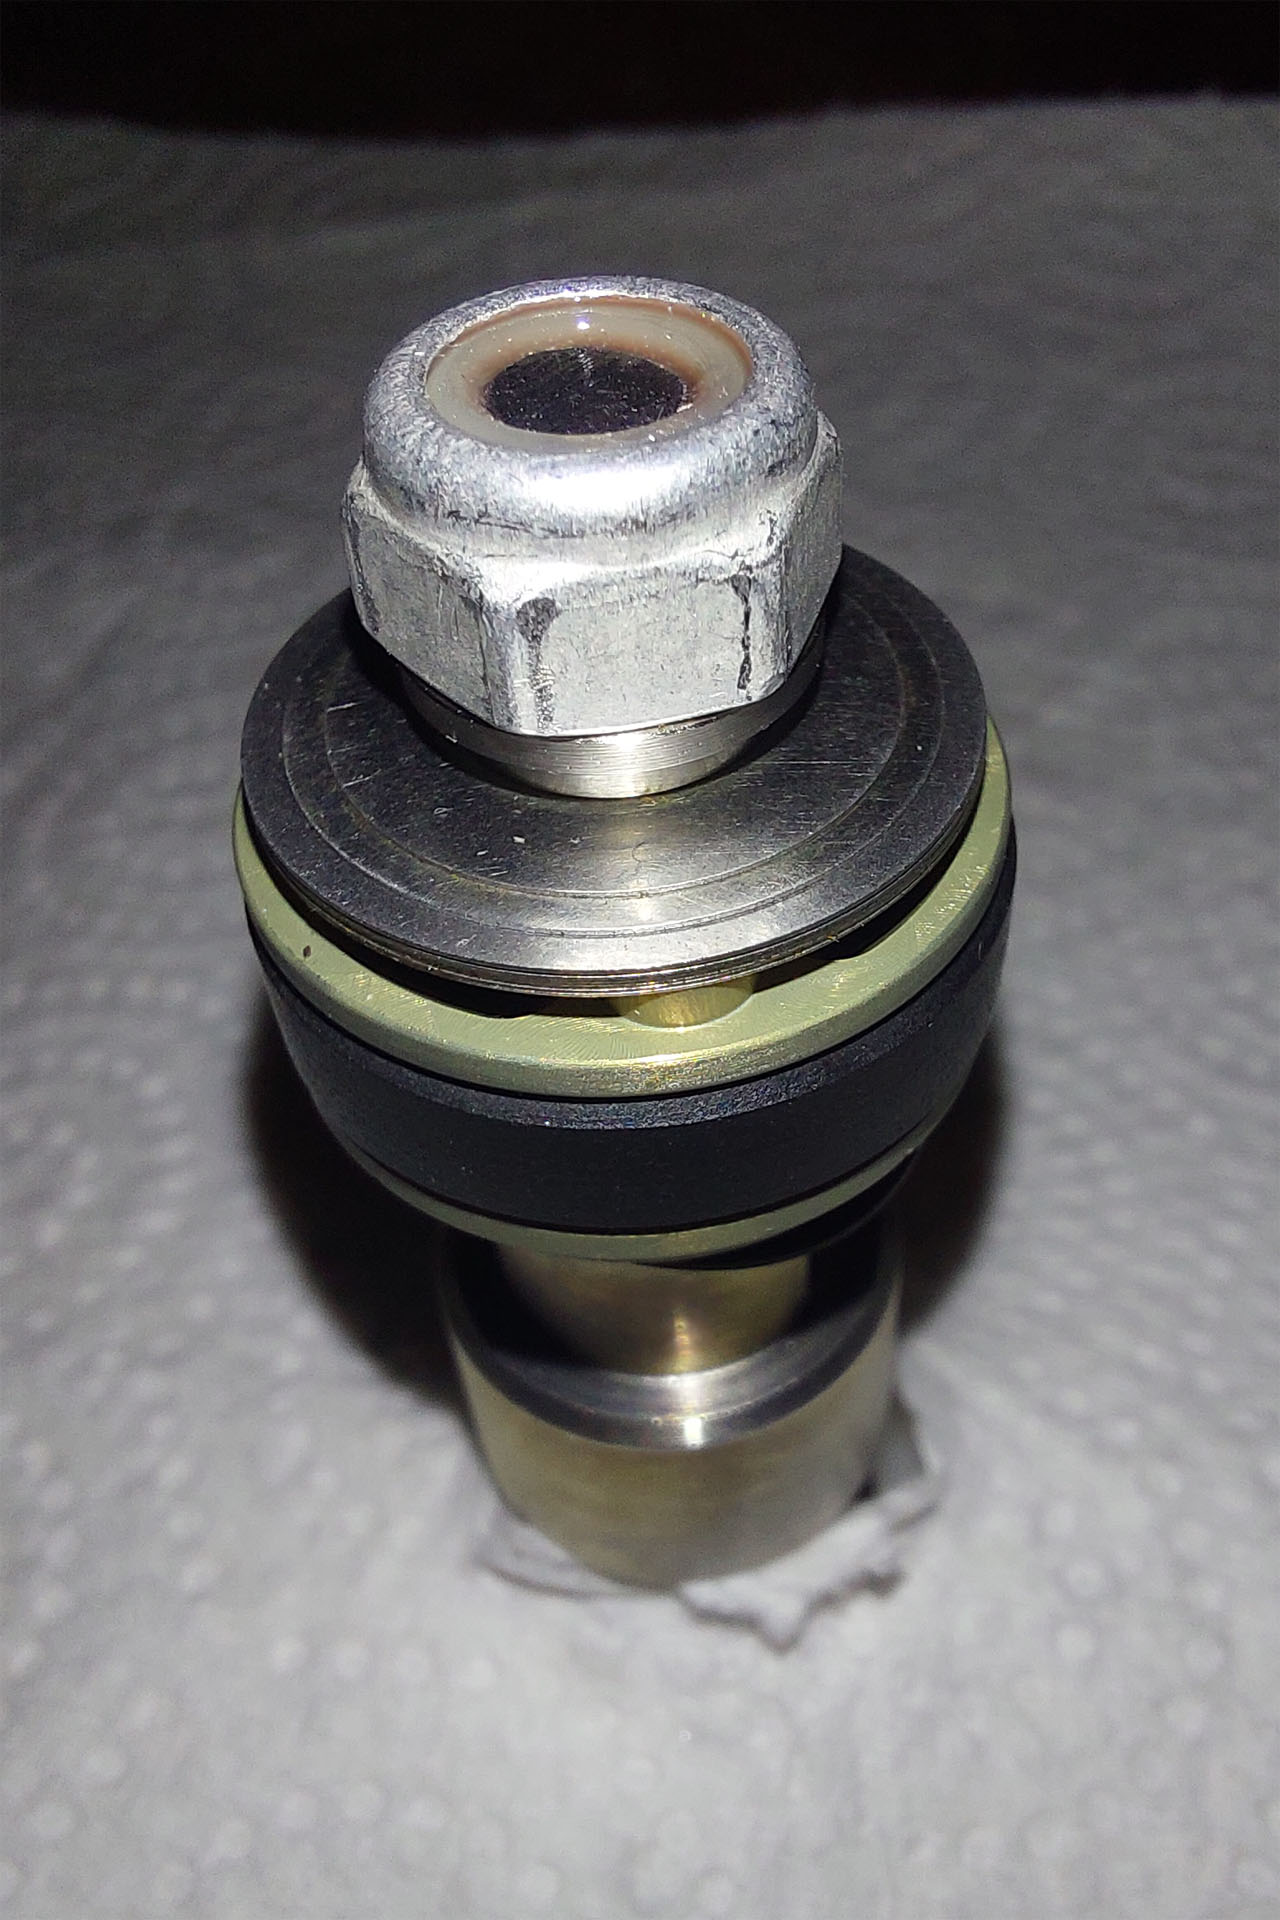
The rebound piston sits at the end of the damping rod. Grab the damping rod and push it all the way down, until the rebound piston comes out of the cartridge housing. We also have to remove the rebound piston now. It is secured by a normal nut, but the tip of the rod with the thread, where the rebound piston sits on, was deformed by the manufacturer to make sure the nut doesn’t come loose by itself. We can’t unscrew the nut like that. Instead we have to grind down the deformed part first. I clamped the rod with 2 plastic pieces with a groove + a piece of cloth into the vice. In addition to that, I covered the rebound valve to prevent the swarf to drop onto the valve. We also won’t need the rebound valve anymore. However, I wanted to keep it clean.

You can either grind it all the way down to the nut, or you unscrew the nut first, until it starts deforming the upper “thread”. Stop immediately and screw the nut downwards again. Like that, you can see a bit easier, how much you have to grind down. The thread is not very long and you want to keep as much of it as possible. With the second method you can usually keep it a bit longer. Afterwards you can remove the rebound piston. In case you want to keep it, hold a screw and a nut ready to secure the old piston.

Deburr the tip of the rod
Finished K-Tech rebound piston

Deburr the end of the rod thread carefully and degrease it, too. Before you start installing your new rebound piston, take a new nut and test, if it slides onto the thread of the rod properly. Then we come to the second dodgy part. Time for another beer, or relax a bit at least.

We have to remove the screw from the rebound valve and place it onto the damping rod. Of course, we also have to keep all the parts in the right order again. Secure the stack with a nut quickly as soon as you got it on the rod and wipe away you sweat 😉

Now, follow the same act like before – add a drop of red loctite onto the thread (not too much) and again Important! Make sure, that the aluminium clamp washer goes through the shim and doesn’t damage it. Hold the piston together with your fingers and tighten it with a stop nut and 30 in-lbs (3,4 N-m). I took the aluminium nut, that came with the K-Tech kit. The new stop nut is a bit higher than the stock one and the thread doesn’t reach all the way through the nut. However it still goes into the stop part of the nut + we used some red loctite to be on the safe side.

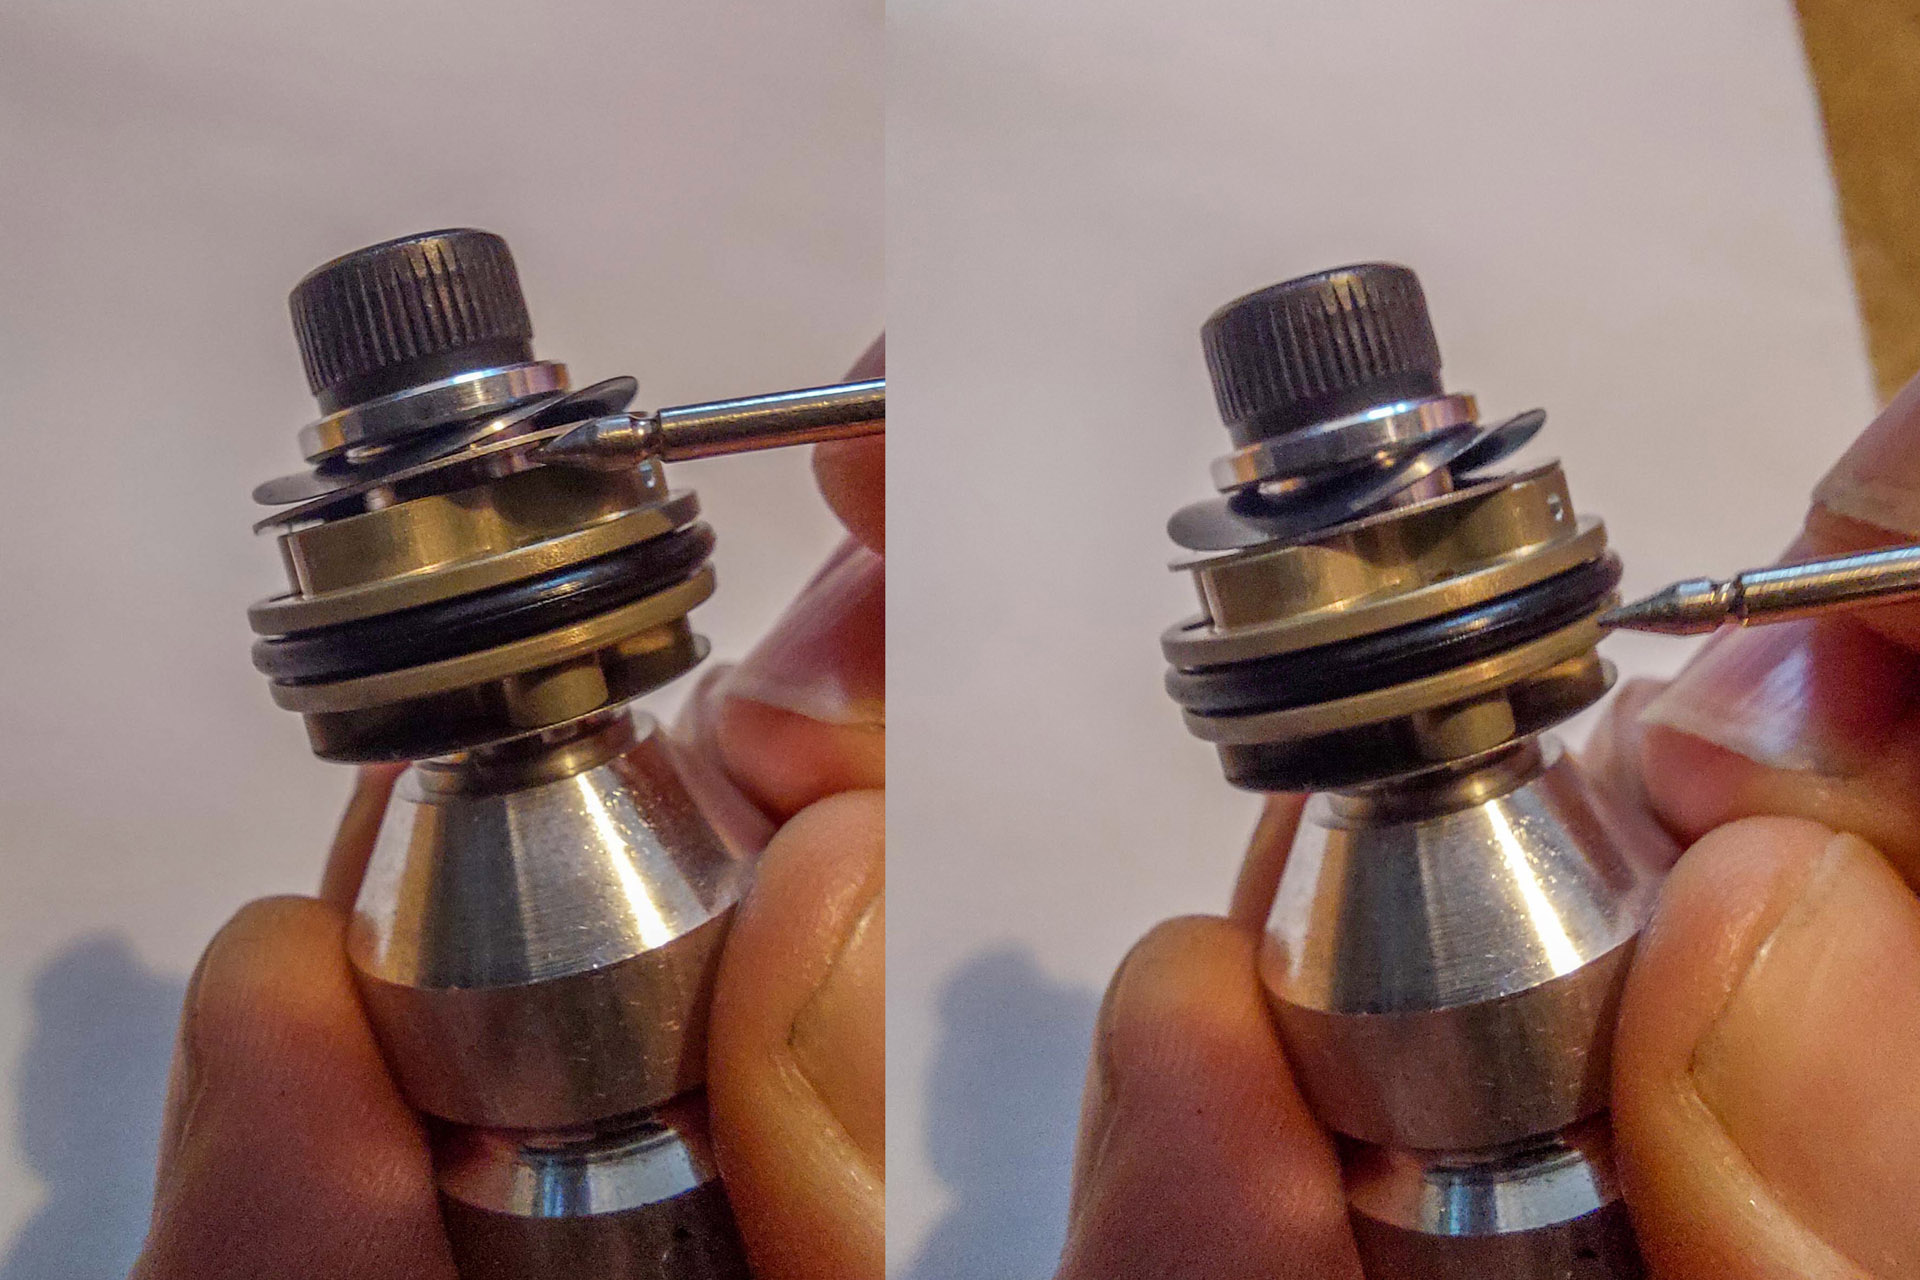
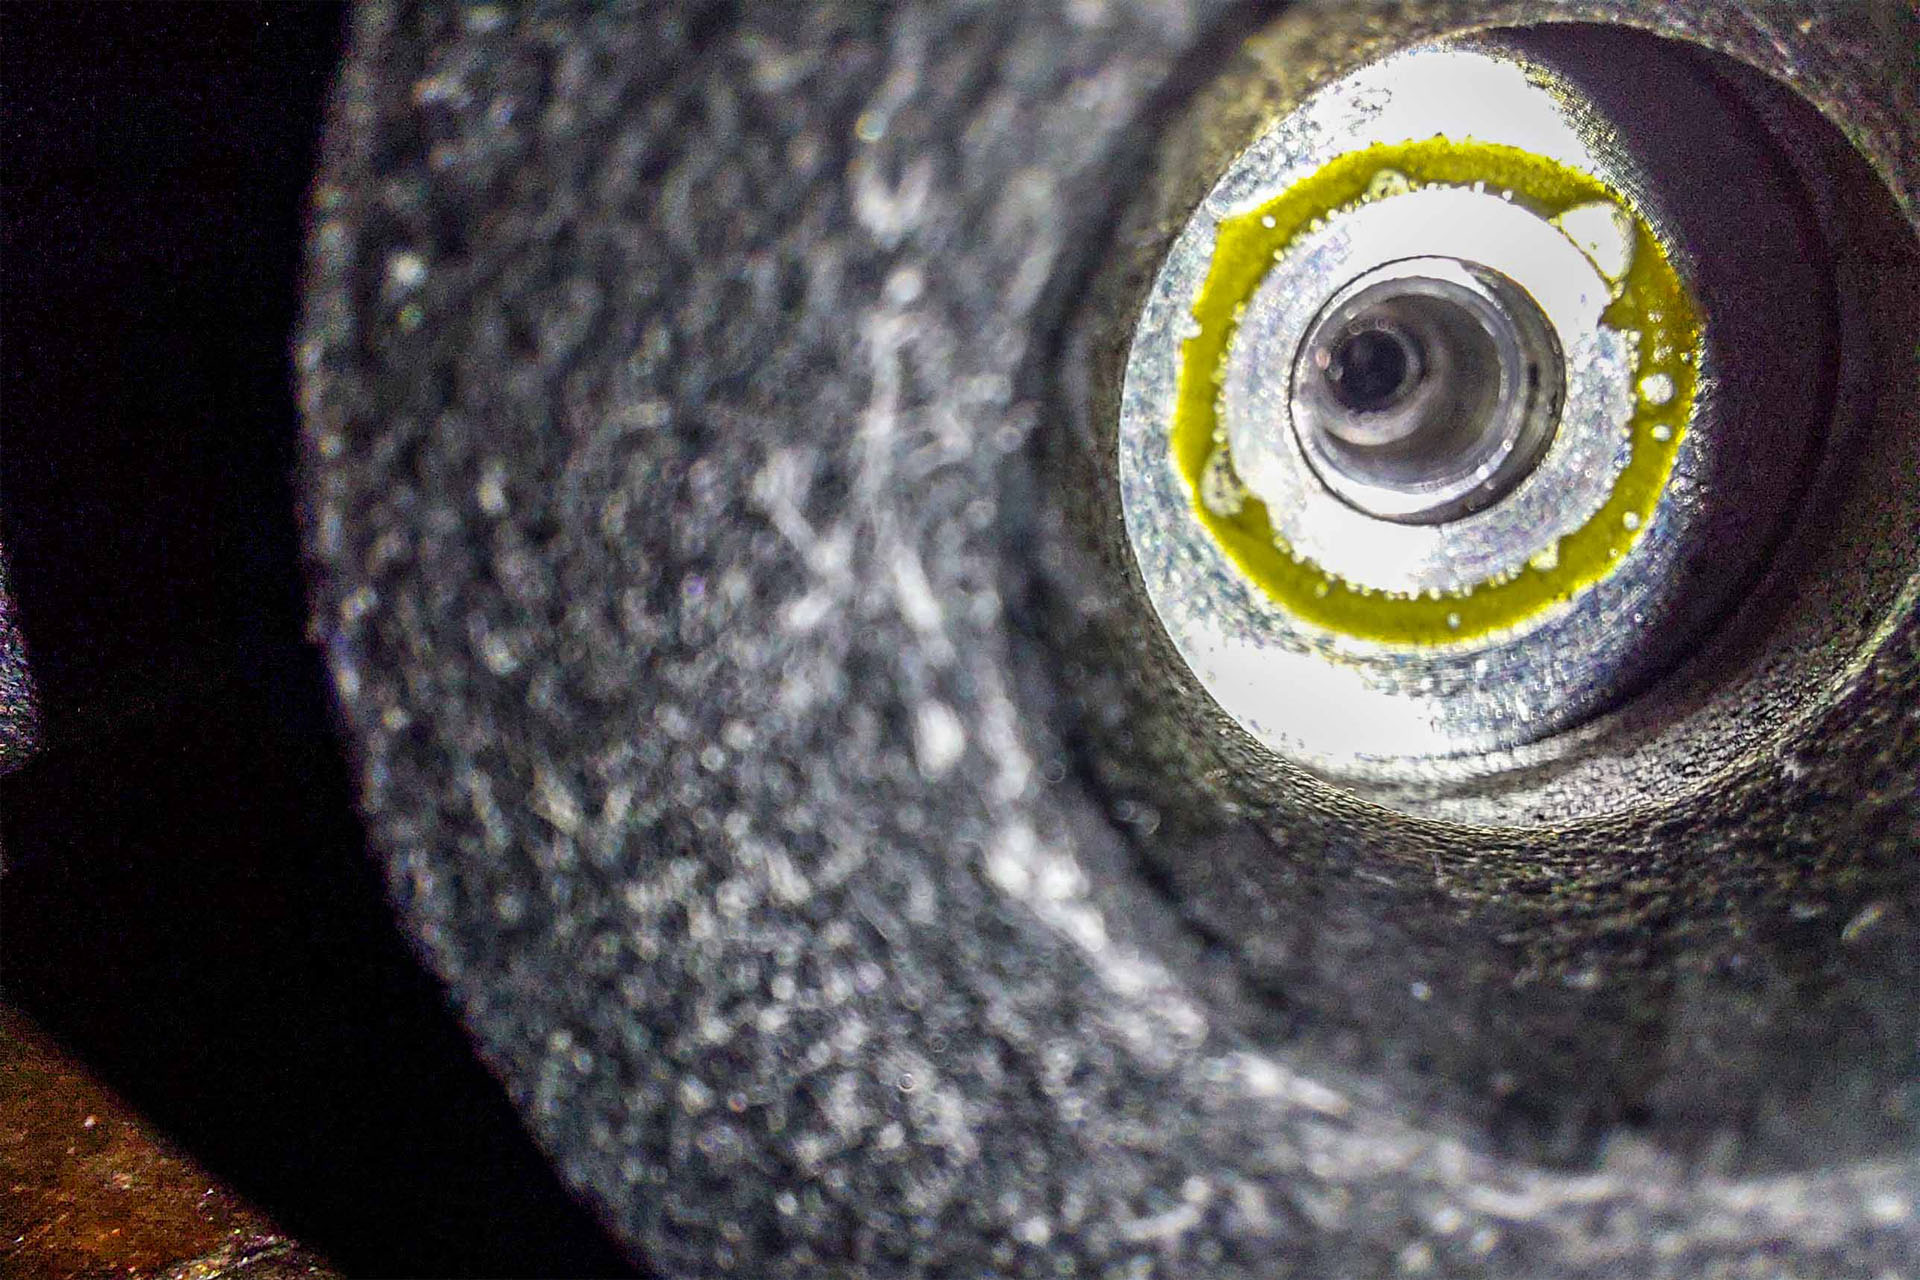
Finally, we do the same check like we did with the compression piston. On the left side, you can see the shim is lifted. On the right side it is in its original position.

Check K-Tech rebound piston

We are ready to reassemble the cartridge. Pull the damping rod with the rebound piston back into the cartridge housing.

Insert the compression piston. Be careful with the piston sealings, that will get stuck a bit at the groove. You can coat them with some fork oil to make the job easier. Our compression piston didn’t want to slide in all the way immediately, although its sealing had already passed the groove. Therfore I had to give it a gentle stroke with my rubber hammer (That was a little joke btw – it was already broken before. Please don’t beat it like a maniac!).

Push the compression piston inwards until you can reach the groove and reinsert the circlip.

Cartridge position in the forkl leg

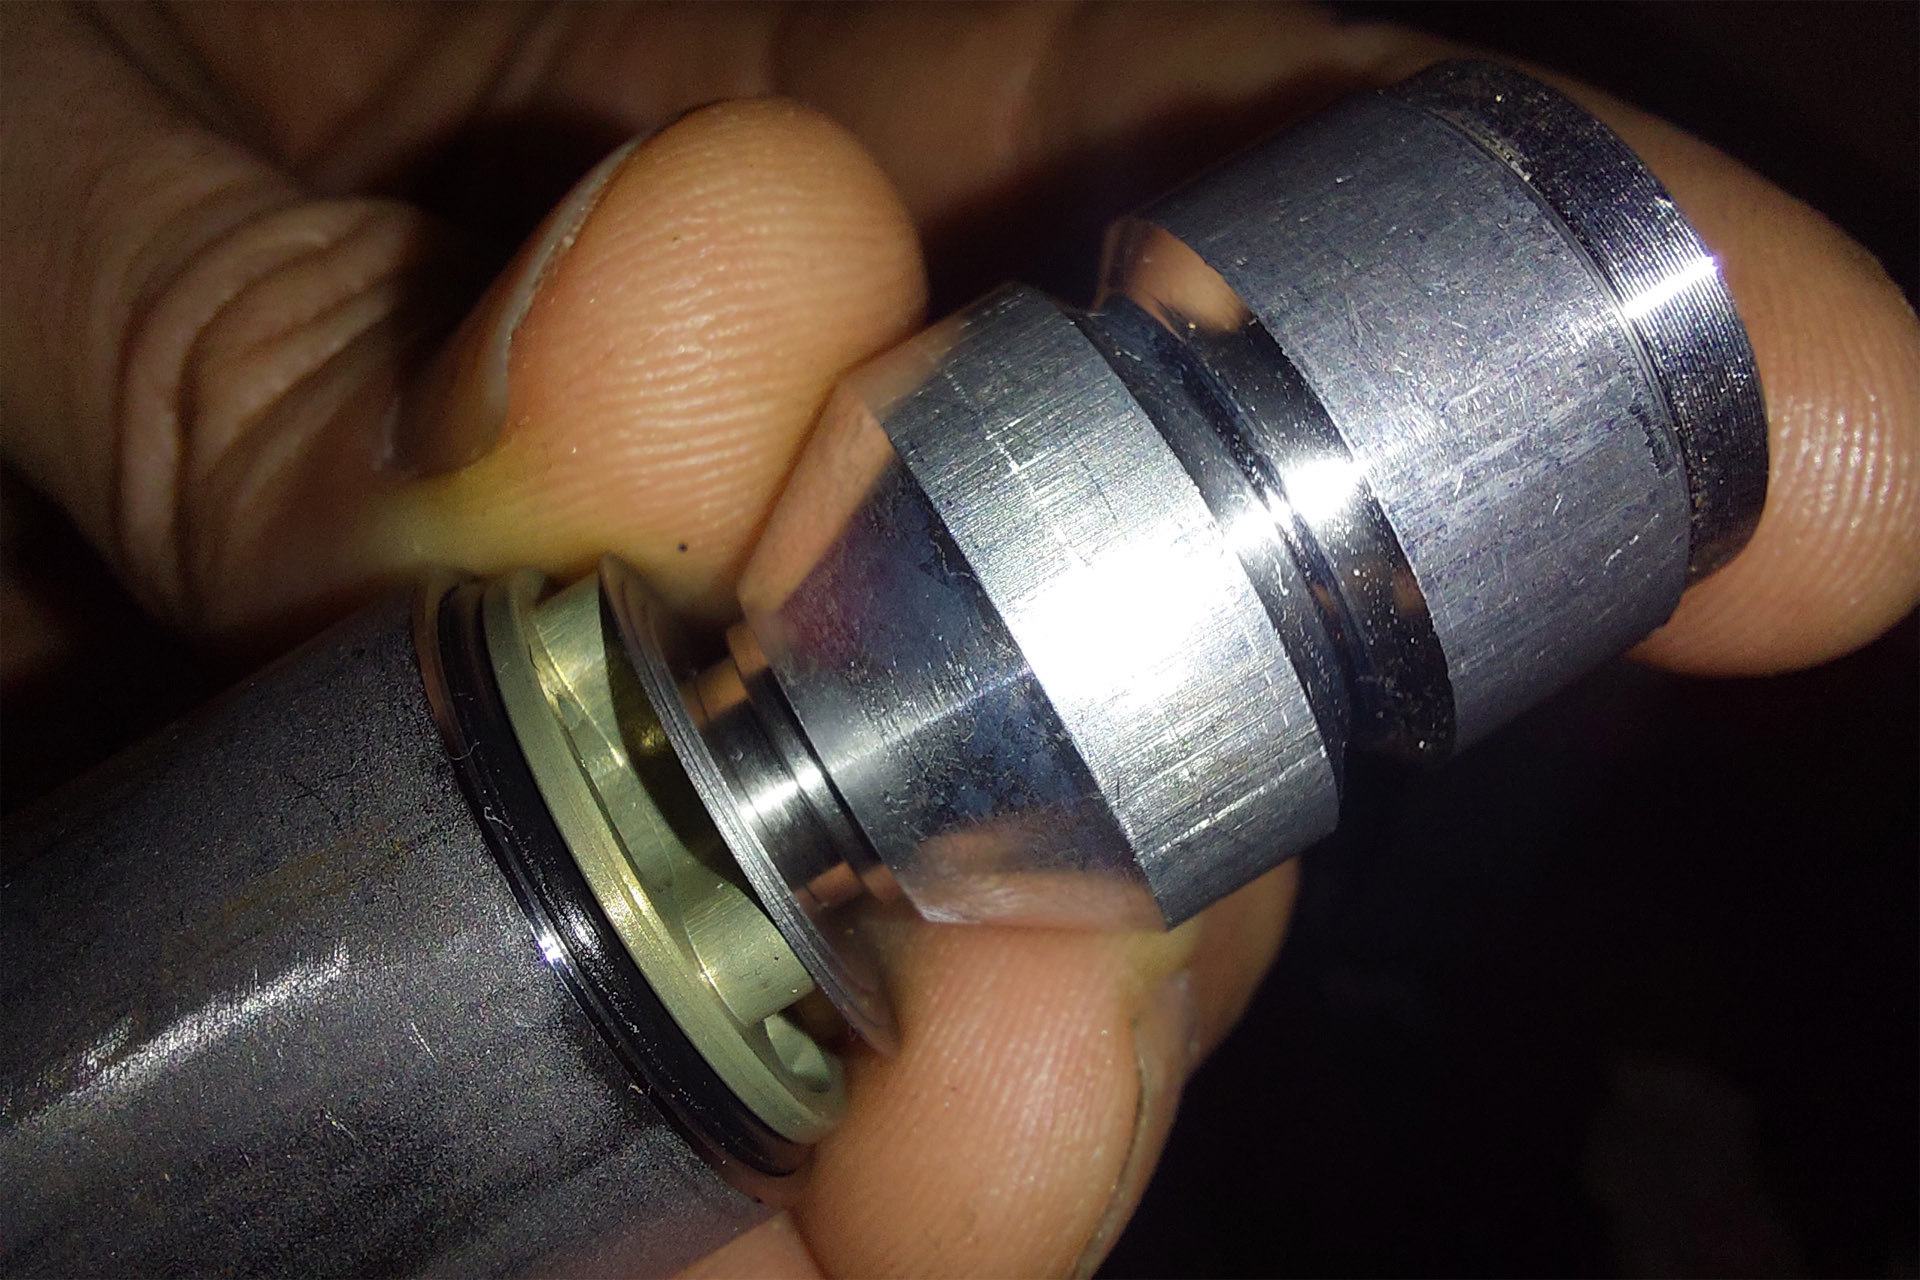
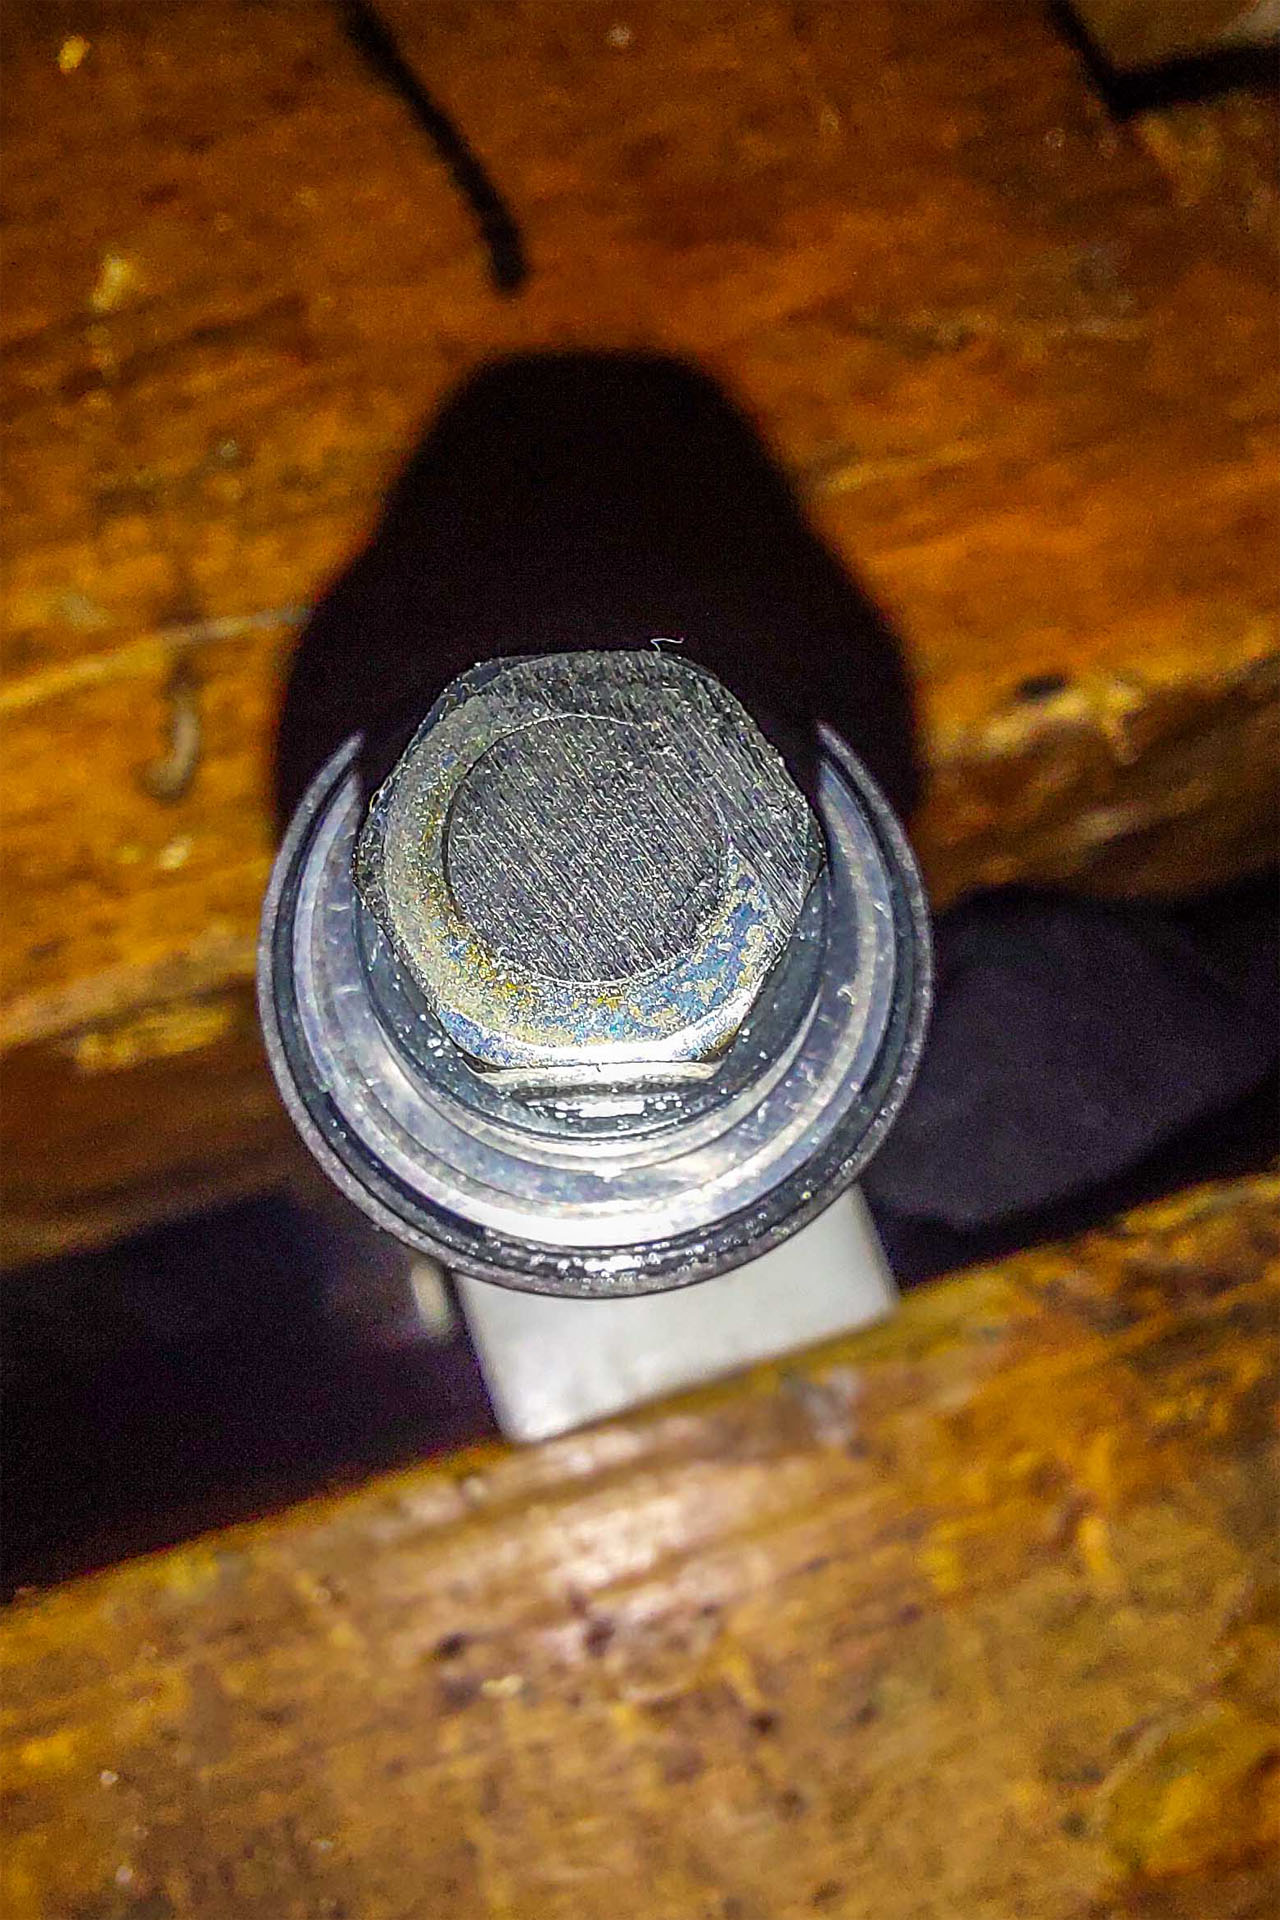
The cartridge can be reinstalled into the fork leg now. Push the compression piston all the way down again. It should be at the level of the end of the cartridge housing. Clean and degrease the bottom screw, the copper washer and the thread of the compression base. Afterwards hold the fork leg upright and insert the cartridge all the way into the fork leg. At the bottom of the fork leg is an opening exactly as wide as the bottom of the cartridge. You have to aim and insert the cartridge into that opening. Then place the fork leg horizontally again and check, if the cartridge is in its position. You might need a torch for that. 

Add some red loctite onto the thread of the bottom screw and turn it gently until it starts to tighten. In case the cartridge starts turning, pull on the damping rod at the same time. Some help of a second person makes it a bit easier. Tighten the bottom screw with 20N-m. This value is from the Honda CRF250L service manual.

Fill in the new fork oil

Ready to fill in new fork oil. Unfortunately, we can’t use the Honda 10W fork oil anymore. With 35,2 cSt it is way too thick for the new valves. K-Tech fork oil has 17,5 cSt and they recommend an oil between 16 cSt – 20 cSt @ 40°C. So I ordered some Motul Expert 5W with 18,9 cSt. I measured ~700 ml of oil, that came out of the fork. Since the K-Tech pistons come without a manual, I checked RaceTech’s manual and they recommend 610 ml of oil for the damping side, if mounted without their optional spring. Since the pistons are quite similar and they also use thinner oil, that sounds promising for the K-Tech pistons, too.

So, I will start with 610 ml first and I might have to ride a bit to find the right oil capacity. If the progression of the fork should be too high, I’ll take some oil out and the other way around. 

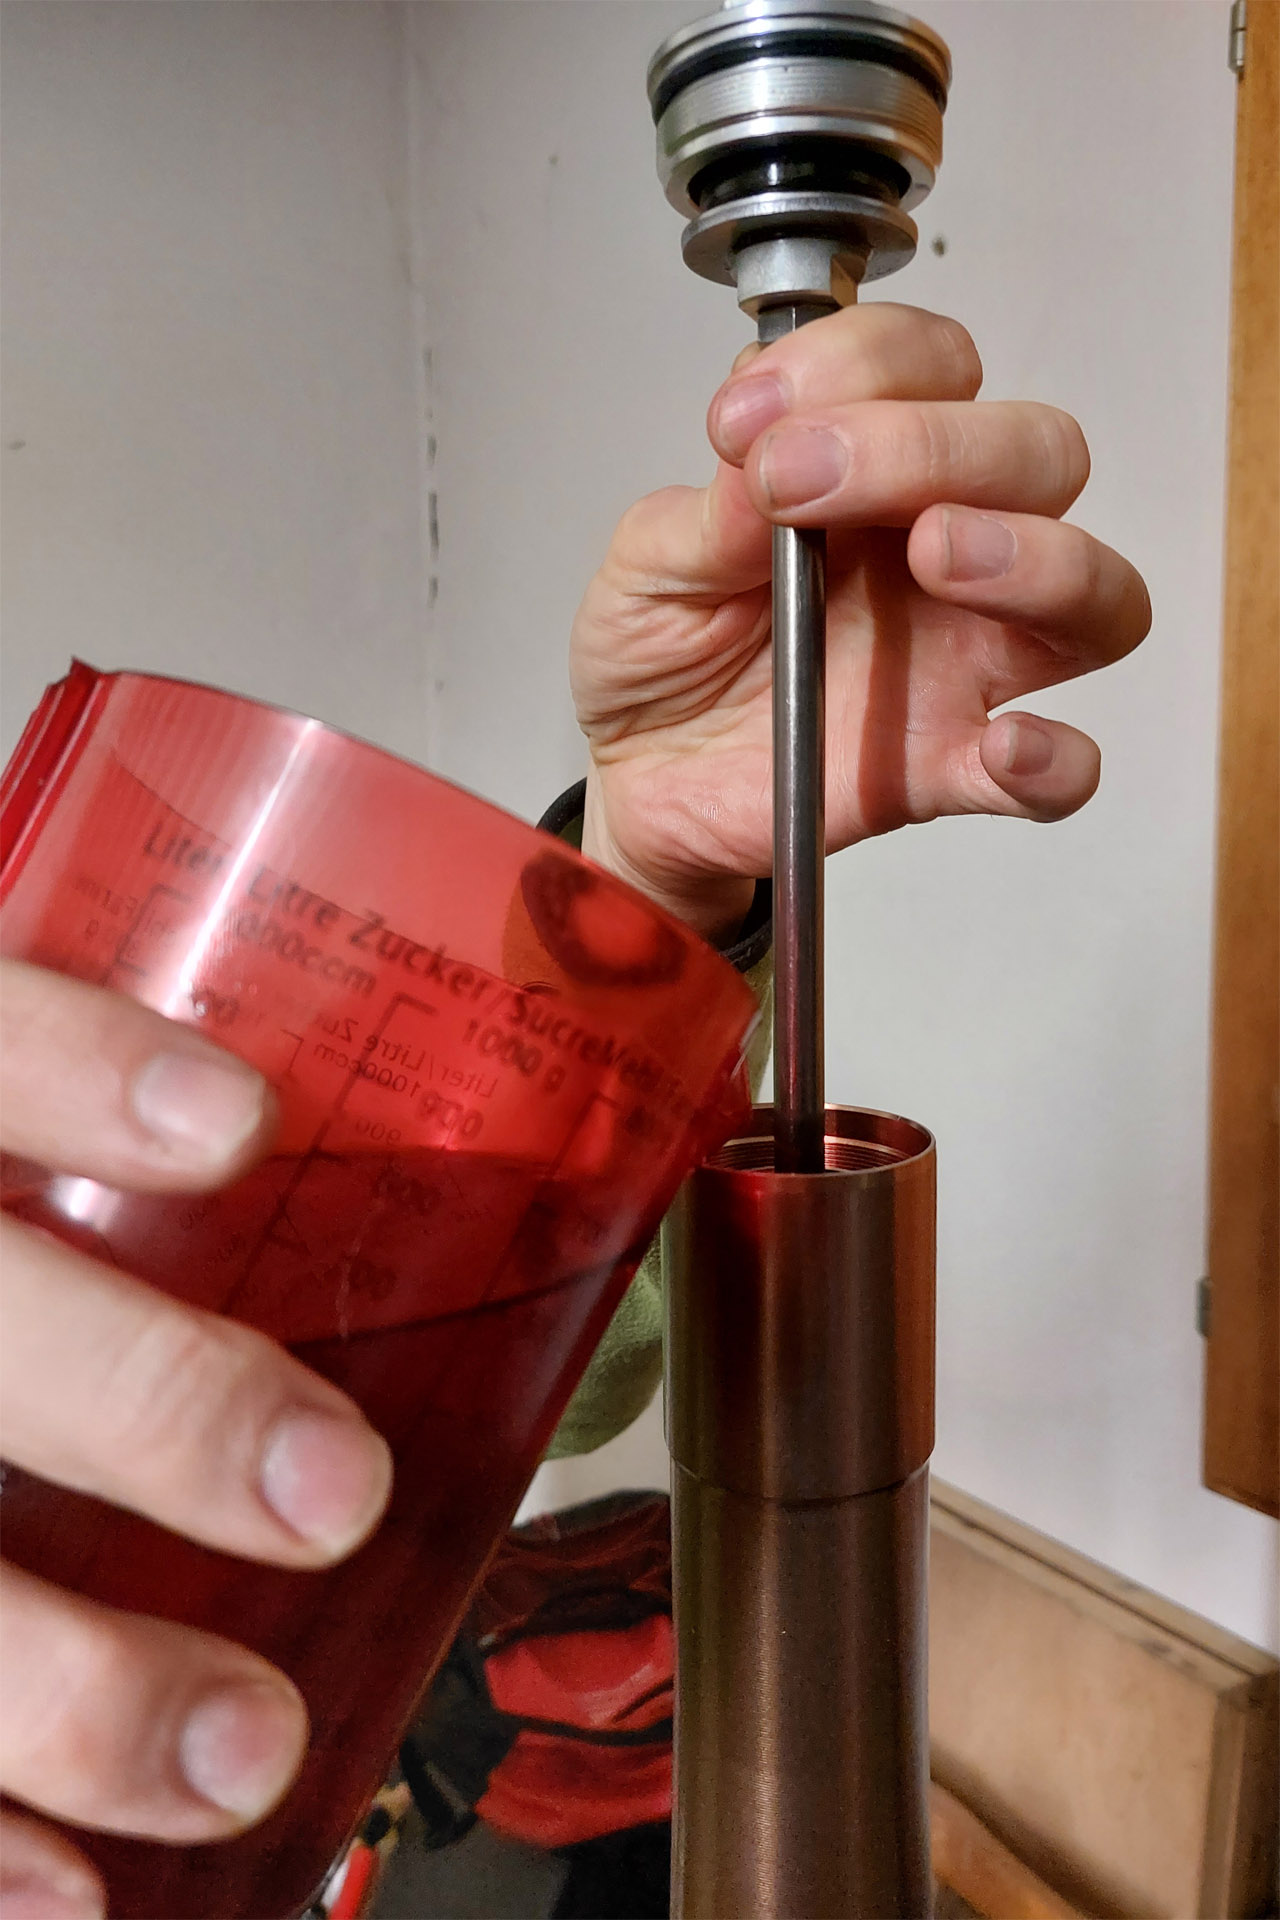
Hold the fork leg upright an fill in the oil. Move the damping rod up and down while doing that, to make the cartridge fill with oil and release the air. You should notice, that the rebound and compression valves start working after a while as soon as there is enough oil in the cartridge. Before we remount the fork cap, extend the fork leg completely. That’s important, since the correct air volume is responsible for the forks progression. Make sure the seal of the fork cap is all the way at the top and put some fork oil on it. We want to make sure, that it slips into the right position and doesn’t get damaged. Tighten the top cap with reasonable strength – or, if you should have a torque wrench for that, with 35 N-m like the Honda CRF250L service manual says.

And…we are finished with the K-Tech piston upgrade and it is time for a cold beer. I hope, that I didn’t forget anything important and I also hope, that you guys haven’t fallen asleep while reading this long instruction.

Finished CRF300L fork leg

This Post Has 6 Comments

  1. Falk

    Hi, thanks for the detailed explanation. Is it really impossible to fit new fork internals in Germany? Or is it a question of doing it yourself vs a tool shop and adding it to the papers via the TüV?

    1. RTWriders

      Welcome. All safety relevant parts have to be certified in Germany to get the TUV. So are all suspension parts. I haven’t seen any german certified fork upgrades – meaning valve tuning kits or cartridges for the 250/300 yet. There are certified shocks and spring upgrades though. You probably could go to the TUV, pay a lot of money and maybe get your upgrades certified. However, that for sure will be some hassle and money.

  2. Hugo

    Thank you for sharing this, very helpful!
    How does the ride feel now? Do you feel the front wheel more planted providing more traction? You should have more feedback from the terrain as well. Also noticeable when braking, the bike doesn’t dive right away?
    At least that’s what I feel lack of, and also looking for an upgrade like this.
    Wish you great adventures!

    1. RTWriders

      Hi Hugo,
      front wheel is definitely not diving anymore that much, when braking. Especially, since we usually ride with a lot of luggage. Response feels great, however I haven’t ridden the stock setup much and we’ve also installed a heavier spring.

  3. Stephen

    Great write up. I watched your video too. Thanks for putting it together. How did the left side 610 ml of fork oil work? Did you end up changing the amount?

    1. RTWriders

      Thanks Stephen,
      the 610ml were doing well for the last 15000km.

Leave a Reply to Stephen Cancel reply